Blog

Your blog category

Blog

Creating a Character Blowing Up a Balloon

The Art of Animation: Creating a Character Blowing Up a Balloon Introduction Animation is a captivating art form that breathes life into characters and stories, captivating audiences of all ages. Among the myriad of actions and expressions an animator can bring to life, one seemingly simple yet profoundly expressive action is that of a character blowing up a balloon. This action, though straightforward, involves a complex interplay of physics, emotion, and timing that challenges and hones an animator’s skills. In this extensive blog, we will delve into the nuances of animating a character blowing up a balloon, from the initial concept and character design to the final polished animation. We will explore techniques, tips, and tricks used by seasoned animators to convey the delicate and often humorous act of balloon inflation. Conceptualizing the Scene Before diving into the technical aspects of animation, it’s essential to lay a strong conceptual foundation. The first step is to understand the context of the scene. Ask yourself: Who is the character? Is the character a child, a clown, an animal, or perhaps a robot? Each character type brings its unique set of mannerisms and physical traits. Why is the character blowing up a balloon? Is it for a birthday party, a scientific experiment, or sheer boredom? The motivation behind the action will influence the character’s demeanor and effort. Where is the scene set? The setting could be a colorful party room, a serene park, or a whimsical fantasy world. The environment can add layers of visual storytelling. Character Design and Expression With the concept clear, the next step is designing the character. The design should reflect the personality and context established earlier. Here are some key considerations: Physical Traits: Proportions: Exaggerated features can enhance comedic effect. For instance, a character with a large mouth can amusingly struggle with a balloon. Flexibility: Ensure your character’s design allows for the necessary range of motion. For example, rubbery limbs can add a cartoony, elastic feel to the action. Facial Expressions: Blowing up a balloon involves a series of distinct facial expressions, from determination to exhaustion. Study real-life references and experiment with exaggerated versions to see what works best for your character. Body Language: The entire body should contribute to the action. A character might lean back with effort, shake slightly from the exertion, or even lose balance. Storyboarding the Action Storyboarding is a crucial step in planning your animation. It involves sketching out key frames that depict the main actions and expressions of the character. Here’s how to approach it: Identify Key Poses: Start with the character holding the balloon. Show the character’s cheeks puffing out as they blow air into the balloon. Illustrate the balloon gradually expanding. Capture moments of strain, surprise, or even mishaps, like the balloon slipping out of their hands. Timing and Pacing: Determine the timing for each key pose. For instance, the initial blows might be quick and energetic, while the later ones could be slower and more strained as the character tires. In-Between Frames: Plan the transition between key poses. Smooth transitions are essential for maintaining the flow and realism of the animation. Animation Techniques With the storyboard as a guide, it’s time to animate. Whether you’re working in 2D, 3D, or stop-motion, certain principles remain consistent. Squash and Stretch: This principle is vital for conveying the elasticity of both the character and the balloon. As the character blows, their cheeks should stretch, and the balloon should squash and stretch in response to the air pressure. Anticipation and Follow-Through: Before blowing, the character might take a deep breath (anticipation), and after blowing, their body might slightly recoil (follow-through). These actions make the motion more believable. Exaggeration: Animation thrives on exaggeration. Amplify the character’s effort, the balloon’s reactions, and any mishaps for a more engaging result. Secondary Actions: Add layers of realism with secondary actions. For example, if the balloon slips from the character’s hands, their hair or clothes might react to the sudden movement. Facial Animation and Lip Sync The face is a focal point in this animation. Here’s how to make it expressive and engaging: Lip Sync: If your character is speaking while blowing up the balloon (perhaps commenting on the difficulty), synchronize the lip movements with the dialogue. Eye Movement: Eyes convey a lot of emotion. They might widen with surprise if the balloon pops, or narrow with determination as the character blows harder. Mouth Shapes: Different shapes will be required for different sounds and expressions. Use a mirror or video reference to capture subtle nuances. Adding Humor Animating a character blowing up a balloon lends itself well to humor. Here are some ways to inject comedy: Unexpected Events: The balloon might pop, slip away, or inflate unevenly, leading to amusing situations. Character Reactions: Exaggerated reactions, such as shock, frustration, or exaggerated relief, can add a comedic touch. Physical Comedy: Incorporate slapstick elements. Perhaps the character gets tangled in the balloon or ends up floating with it. Sound Design Sound plays a crucial role in bringing your animation to life. Consider the following: Breathing Sounds: Sync the sound of the character’s breaths with their actions. Heavy breathing can emphasize effort. Balloon Sounds: The sound of the balloon stretching, squeaking, or popping adds realism. Background Music: A playful or dramatic score can enhance the overall mood and pace of the animation. Refining the Animation Once you’ve completed the initial animation, it’s time to refine: Feedback and Revisions: Show your animation to peers or mentors and gather feedback. Look for areas that need smoother transitions or more exaggerated expressions. Polish: Clean up any rough edges, ensure consistency in the character’s design, and add final touches like shadows or highlights. Rendering: In 3D animation, rendering is the final step where all elements are combined into the finished product. Ensure high-quality settings for the best visual outcome. Licking and Sealing an Envelope: An Art Form in Communication Introduction In an era where digital communication reigns supreme, the act of sending a physical

Blog

Great Animation Exercises to Master

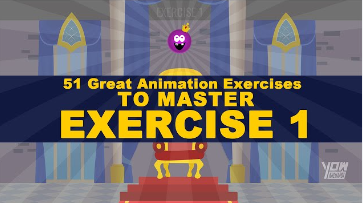
Great Animation Exercises to Master Animation is an art form that combines creativity, technical skill, and patience. Whether you’re an aspiring animator or a seasoned professional, continually honing your skills is essential. Practice is key to mastering the principles of animation and developing a style that stands out. In this blog post, we’ll delve into a series of exercises designed to help animators at all levels refine their craft. From simple motions to complex sequences, these exercises will challenge your abilities and push you towards excellence. Table of Contents The Basics of Animation The Importance of Foundations Understanding Timing and Spacing Exercise 1: Bouncing Ball Objective Steps and Tips Exercise 2: Pendulum Swing Objective Steps and Tips Exercise 3: Flour Sack Animation Objective Steps and Tips Exercise 4: Walk Cycle Objective Steps and Tips Exercise 5: Character Jump Objective Steps and Tips Exercise 6: Lip Sync Animation Objective Steps and Tips Exercise 7: Weight Lift Objective Steps and Tips Exercise 8: Overlapping Action and Follow-Through Objective Steps and Tips Conclusion The Path to Mastery Keeping Inspired and Motivated The Basics of Animation The Importance of Foundations Animation is built on a set of fundamental principles first articulated by the pioneers of animation at Disney. These principles include squash and stretch, anticipation, staging, straight-ahead action and pose-to-pose, follow-through and overlapping action, slow in and slow out, arcs, secondary action, timing, exaggeration, solid drawing, and appeal. Understanding and mastering these principles is crucial for creating believable and engaging animations. Understanding Timing and Spacing Timing refers to the number of frames between two poses, determining the speed of the action. Spacing is about where those frames are placed, affecting the smoothness and fluidity of the motion. Proper timing and spacing are vital for creating the illusion of life, making the animation feel natural and dynamic. Exercise 1: Bouncing Ball Objective The bouncing ball exercise introduces the concepts of timing, spacing, squash and stretch, and the laws of physics such as gravity, weight, and bounce. It’s a fundamental exercise for understanding how objects move in space. Steps and Tips Start with Keyframes: Draw the ball at the highest and lowest points of the bounce. Add Squash and Stretch: At the point of impact, the ball should squash slightly, and as it leaves the ground, it should stretch. Determine Timing: Decide how many frames each part of the bounce will take. In-Between Frames: Add the in-between frames, keeping spacing in mind to ensure smooth motion. Refinement: Adjust timing and spacing to make the motion feel natural. Exercise 2: Pendulum Swing Objective The pendulum swing exercise helps animators understand arcs, ease in and ease out, and the principles of inertia and momentum. Steps and Tips Draw the Extremes: Start by drawing the pendulum at the highest points of its swing. Determine the Arc Path: The pendulum moves along an arc; draw this path lightly. Timing: Decide the number of frames for a full swing. In-Betweens: Add the in-between positions, ensuring the pendulum speeds up as it descends and slows down as it rises. Final Touches: Refine the motion to enhance the sense of weight and natural movement. Exercise 3: Flour Sack Animation Objective Animating a flour sack is a great way to practice conveying weight, flexibility, and emotion without facial expressions or limbs. Steps and Tips Create Key Poses: Draw the flour sack in a series of key poses that represent the main actions or emotions you want to convey. 2. Incorporate Weight and Flexibility: Show how the sack bends and stretches, emphasizing its weight and softness. 3. Timing and Spacing: Pay attention to how quickly the sack moves between poses, adjusting for more dynamic actions. 4. Secondary Action: Add subtle movements, such as the bottom of the sack dragging slightly or the top flopping over, to enhance realism. 5. Refinement: Iterate on the movement to ensure the actions feel smooth and natural, adding details to bring the sack to life. Exercise 4: Walk Cycle Objective Creating a walk cycle helps animators understand how to animate a character’s locomotion, focusing on weight distribution, balance, and rhythm. Steps and Tips Plan the Walk: Sketch out the key poses: contact, recoil, passing, and high point. Work on Timing: Typically, a walk cycle consists of 24 frames for a complete cycle (two steps). Balance and Weight: Make sure the character’s weight shifts correctly, showing the impact of each step. Add Overlapping Action: Hair, clothing, and other parts of the character should follow the main body movements slightly delayed. Polish the Cycle: Loop the animation to ensure it transitions smoothly and adjust any awkward movements. Exercise 5: Character Jump Objective Animating a jump helps in understanding principles like anticipation, action, and reaction, as well as the effects of gravity on the body. Steps and Tips Anticipation Pose: Start with the character crouching down in preparation for the jump. Launch and Airborne: Animate the character pushing off the ground and moving through the air. Peak of the Jump: Show the character at the highest point, with a slight squash to depict stretching. Descent and Landing: Animate the character coming down and landing, incorporating a squash upon impact. Follow-Through: Add subtle follow-through actions, such as a slight rebound after landing, to enhance realism. Exercise 6: Lip Sync Animation Objective Lip-syncing animation focuses on matching mouth movements with dialogue, emphasizing timing and expression. Steps and Tips Analyze the Dialogue: Break down the dialogue into phonemes and corresponding mouth shapes. Key Poses: Sketch the main mouth shapes for the key sounds in the dialogue. Timing: Sync the mouth movements precisely with the audio track. Facial Expressions: Add expressions that match the tone and emotion of the dialogue. Refinement: Ensure smooth transitions between mouth shapes and integrate the movements with the rest of the face. Exercise 7: Weight Lift Objective Animating a character lifting a heavy object helps understand how to convey effort, strain, and the impact of weight on the body. Steps and Tips Preparation Pose: Start with the character bending down, preparing

Blog

Mastering 3D Animation: A Comprehensive Guide

Mastering 3D Animation: A Comprehensive Guide Welcome to the world of 3D animation, a realm where imagination meets technology, and creativity knows no bounds. Whether you’re an aspiring animator eager to break into the industry or a hobbyist looking to expand your skills, this comprehensive guide to mastering 3D animation will provide you with all the tools and knowledge you need to bring your visions to life. From the fundamentals of animation principles to the intricacies of advanced techniques, we will explore the vast landscape of 3D animation, offering step-by-step instructions, valuable insights, and practical tips to help you on your journey. So, buckle up and get ready to dive into the fascinating universe of 3D animation! Introduction to 3D Animation What is 3D Animation? 3D animation involves creating moving images in a three-dimensional digital environment. This process entails designing objects, characters, and environments, then bringing them to life through motion. Unlike traditional 2D animation, which deals with flat images, 3D animation offers depth, allowing for more realistic and dynamic representations. The Evolution of 3D Animation The journey of 3D animation began in the mid-20th century with experimental techniques and rudimentary computer graphics. Over the decades, technological advancements have revolutionized the field, from the pioneering work of Pixar and Disney to the sophisticated visual effects seen in today’s blockbuster films and video games. Understanding this evolution helps appreciate the tools and techniques available to modern animators. Why Learn 3D Animation? 3D animation is a versatile skill with applications in various industries, including film, television, video games, advertising, and virtual reality. Mastering 3D animation opens doors to creative and lucrative career opportunities. Additionally, it enhances problem-solving skills, technical proficiency, and artistic expression. The Fundamentals of 3D Animation Basic Principles of Animation Before diving into 3D animation, it’s crucial to grasp the fundamental principles that underpin all forms of animation. These principles, originally developed by Disney animators, serve as the foundation for creating believable and engaging animations. Squash and Stretch: This principle gives a sense of weight and flexibility to objects. It ensures that animated characters and objects appear dynamic and life-like. Anticipation: Prepares the audience for an action, making the movement more realistic and engaging. Staging: Focuses on the presentation of an idea so that it is unmistakably clear. Straight Ahead Action and Pose-to-Pose: These are two different approaches to creating movement. The former involves drawing out a scene frame by frame from start to finish, while the latter involves creating key poses and then filling in the in-between frames. Follow Through and Overlapping Action: These principles ensure that objects continue to move even after the main action is completed, adding realism. Slow In and Slow Out: Refers to the gradual acceleration and deceleration of objects, making movements more natural. Arcs: Most natural actions follow a slightly circular path, and this principle helps to ensure that animations are smooth and realistic. Secondary Action: Adds complexity to the main action, enriching the scene. Timing: Refers to the number of frames used for a given action, crucial for achieving the correct pace. Exaggeration: Used to emphasize certain actions or emotions, making them more noticeable and engaging. Solid Drawing: Refers to the understanding of three-dimensional space and giving objects volume and weight. Appeal: Ensures that characters and objects are engaging and interesting to the audience. Understanding 3D Space In 3D animation, creating a convincing sense of space is essential. This involves mastering concepts like perspective, depth, and spatial relationships. Understanding how objects interact within a three-dimensional environment is crucial for creating realistic animations. Software and Tools There are various software options available for 3D animation, each with its strengths and features. Some of the most popular include: Autodesk Maya: Known for its robust tools and widespread use in the industry. Blender: A free, open-source option that is powerful and versatile. Cinema 4D: Popular for motion graphics and easy-to-use interface. 3ds Max: Another industry staple, particularly in game development and architecture. Choosing the right software depends on your specific needs, budget, and career goals. Getting Started with 3D Animation Setting Up Your Workspace A well-organized workspace is essential for efficient workflow. This includes customizing the software interface to suit your preferences, organizing your files systematically, and ensuring your hardware meets the necessary specifications for smooth operation. Basic Modeling Techniques Modeling is the process of creating the 3D objects that will be animated. It involves several techniques, such as: Polygonal Modeling: The most common method, involving the creation of objects using polygons. NURBS Modeling: Uses curves to create smooth surfaces. Sculpting: Allows for more organic and detailed models, similar to clay modeling in the physical world. Texturing and Shading Once the models are created, they need to be textured and shaded to look realistic. This involves applying images (textures) to the surfaces of the models and adjusting the way light interacts with these surfaces (shading). Rigging and Skinning Rigging is the process of creating a skeleton for a 3D model so it can move. Skinning involves attaching the 3D model to this skeleton. Proper rigging and skinning are crucial for creating believable animations, especially for characters. Animation Techniques Keyframe Animation Keyframe animation is the traditional method of animating objects by defining key positions (keyframes) and letting the software interpolate the in-between frames. This technique is fundamental and forms the basis of most animations. Motion Capture Motion capture (mocap) involves recording the movements of real actors and applying these movements to 3D models. This technique is widely used in film and video games for creating realistic animations. Procedural Animation Procedural animation uses algorithms and mathematical functions to generate motion automatically. This technique is useful for animating complex systems or natural phenomena, like crowd movements or weather patterns. Physics-Based Animation Physics-based animation simulates real-world physical laws to create realistic movements. This includes simulating gravity, collisions, and other forces that affect how objects move and interact. Advanced Techniques and Tips Facial Animation Creating realistic facial animations is one of the most challenging aspects of 3D animation. It involves

Blog

Complete Course For The Complete Beginner

Introduction Animation is a dynamic and exciting field that has captivated Complete Course For The Complete Beginner  audiences for generations. From the early days of hand-drawn cartoons to the sophisticated computer-generated imagery (CGI) of today, animation has evolved into a multifaceted art form that merges creativity, technology, and storytelling. Whether you dream of creating your own animated series, working in the film industry, or simply exploring a new hobby, understanding the fundamentals of animation is the first step towards bringing your visions to life. What is Animation? Animation is the process of creating the illusion of motion and change by rapidly displaying a sequence of static images that minimally differ from each other. The origins of animation can be traced back to the prehistoric cave paintings where animals were depicted with multiple legs in superimposed positions, clearly attempting to convey the perception of motion. History of Animation The history of animation is rich and varied, starting with early mechanical devices like the phenakistoscope and zoetrope in the 19th century, which created simple moving images. The advent of film allowed for more complex animations, and pioneers like Winsor McCay and Walt Disney revolutionized the industry with iconic characters and stories. Types of Animation There are several types of animation, each with its own unique techniques and applications: Traditional Animation: Also known as cel animation, this is the classic hand-drawn style where each frame is drawn by hand. 2D Animation: Digital version of traditional animation using software to create characters, storyboards, and backgrounds in two-dimensional space. 3D Animation: Involves creating characters and environments in a three-dimensional space using computer software. Stop Motion: Involves photographing physical objects in small increments to create the illusion of movement. This includes claymation and puppet animation. Motion Graphics: Primarily used for creating animated logos, promotional videos, and other forms of digital media where the text and graphics are the primary focus. Experimental Animation: Breaks traditional rules of animation and can include any method that creates moving images in a non-conventional manner. Tools and Software for Animation Modern animators have a wide range of tools and software at their disposal: Adobe Animate: Ideal for creating interactive animations for web, television shows, and games. Toon Boom Harmony: Widely used in the industry for 2D animation, offering robust features for traditional and digital animation. Autodesk Maya: A leading 3D animation software used in film, television, and gaming. Blender: An open-source 3D creation suite that supports the entirety of the 3D pipeline. Dragonframe: A popular choice for stop motion animation, providing precise control over the animation process. The Animation Process The process of creating an animation typically involves several stages: Concept Development: This is the brainstorming phase where the story, characters, and overall vision are conceived. Storyboarding: Creating a visual representation of the animation through sketches that outline key scenes and actions. Design and Modeling: Designing the characters, props, and environments in detail. Animation: Bringing the designs to life by creating movement frame by frame. Rendering: Converting the animated scenes into final images or sequences. Compositing and Editing: Combining different elements and making final adjustments to ensure coherence and flow. Sound Design: Adding sound effects, dialogue, and music to enhance the storytelling. Key Principles of Animation The art of animation is governed by several fundamental principles, often referred to as the “12 Principles of Animation” developed by Disney animators Frank Thomas and Ollie Johnston: Squash and Stretch: Gives the illusion of weight and volume to characters as they move. Anticipation: Prepares the audience for an action to make the movement more realistic. Staging: Focuses on presenting the idea so that it is unmistakably clear. Straight Ahead and Pose to Pose: Different approaches to creating movement, where one is more spontaneous and the other is planned out. Follow Through and Overlapping Action: Ensures that parts of the character continue moving after the main action has stopped. Slow In and Slow Out: The movement starts slowly, builds up speed, and then slows down again, making it more natural. Arcs: Most actions follow a slightly circular path, adding more realism. Secondary Action: Adds additional actions to support the main action, enriching the animation. Timing: The number of frames for a given action, which affects the speed and feel of the movement. Exaggeration: Emphasizes actions, enhancing the overall appeal. Solid Drawing: Understanding the basics of drawing and anatomy to create believable characters. Appeal: Ensuring that characters and actions are interesting and engaging to the audience. Learning Animation: Where to Start For beginners, the world of animation can seem overwhelming. However, starting with the basics and gradually building up your skills is the key to success. Here are some steps to get you started: Study the Basics: Understand the different types of animation and the principles that govern them. Practice Drawing: Even if you’re interested in 3D animation, understanding how to draw will help you visualize movements and designs. Learn Software: Choose a software that suits your interests and start with beginner tutorials. Programs like Blender are great for beginners as they are free and have extensive online resources. Create Simple Projects: Start with small projects to apply what you’ve learned and gradually increase the complexity. Study Other Animations: Analyze films, shorts, and other animations to understand how professionals achieve their effects. Join Communities: Participate in online forums, social media groups, and local clubs to get feedback and learn from others. Common Challenges and How to Overcome Them Learning Curves: Mastering animation software and techniques takes time. Break down learning into manageable chunks and set realistic goals. Creativity Blocks: Regularly sketch and brainstorm ideas. Take breaks and seek inspiration from different sources. Technical Issues: Ensure your hardware and software are up to date. Troubleshoot using online resources and community forums. Criticism and Feedback: Use feedback as a tool for improvement. Understand that criticism is part of the growth process. The Ultimate Guide to Animations in CSS Animation in the Modern World Animation is not just confined to entertainment; it has numerous applications across different fields:

Blog

The Ultimate Guide to Animations in CSS

Introduction In today’s web development landscape, creating visually engaging and The Ultimate Guide to Animations in CSS  interactive websites is paramount. Animations play a crucial role in enhancing user experience by providing visual feedback, improving navigation, and making content more dynamic and attractive. CSS (Cascading Style Sheets) animations offer a powerful yet straightforward way to implement these effects without relying on JavaScript or other complex technologies. This comprehensive guide aims to demystify CSS animations, providing you with the knowledge and tools to incorporate stunning animations into your web projects. Whether you’re a seasoned developer looking to refine your skills or a beginner eager to learn, this guide will cover everything from the basics to advanced techniques, ensuring you can create professional-quality animations with confidence. Why Use CSS Animations? CSS animations are favored for several reasons: Performance: CSS animations leverage the browser’s rendering engine, leading to smoother and more efficient animations compared to JavaScript. Ease of Use: With simple syntax and extensive support across modern browsers, CSS animations are accessible even for those new to web development. Maintainability: Keeping animations within CSS allows for a cleaner separation of concerns, making your codebase easier to manage and maintain. Key Topics Covered Understanding the Basics of CSS Animations Introduction to CSS transitions and keyframes Differences between transitions and animations Basic syntax and properties Creating Simple Transitions Applying transitions to HTML elements Transition properties: duration, timing functions, and delay Practical examples and common use cases Exploring Keyframe Animations Defining keyframes with @keyframes Using animation properties: name, duration, timing function, delay, iteration count, direction, fill mode, and play state Creating complex animations with multiple keyframes Advanced Animation Techniques Chaining and sequencing animations Using CSS variables for dynamic animations Leveraging pseudo-elements for additional effects Performance Considerations Best practices for smooth animations Avoiding common pitfalls that can impact performance Tools and techniques for optimizing animations Practical Examples and Case Studies Step-by-step guides to creating real-world animations Analysis of popular websites with impressive CSS animations Tips and tricks from industry professionals Tools and Resources Recommended tools for creating and testing animations Useful libraries and frameworks to enhance your workflow Further reading and resources for continued learning CSS Text Animations: An In-Depth Guide Introduction In the ever-evolving world of web design, CSS text animations have become a powerful tool for creating engaging and dynamic user experiences. From simple hover effects to complex animations that bring a website to life, CSS text animations can greatly enhance the visual appeal and interactivity of your site. This comprehensive guide will explore the various types of CSS text animations, how to implement them, and best practices to ensure they enhance rather than detract from your site’s usability. Table of Contents What are CSS Text Animations? Why Use CSS Text Animations? Basic CSS Animations Concepts Keyframes Transitions Animation Properties Simple CSS Text Animations Hover Effects Blinking Text Fading Text Intermediate CSS Text Animations Sliding Text Typing Text Effect Text Shadow Animation Advanced CSS Text Animations 3D Text Effects Morphing Text Text Path Animation Performance Considerations Best Practices Conclusion 1. What are CSS Text Animations? CSS text animations are techniques that apply motion or transition effects to text elements using CSS (Cascading Style Sheets). These animations can be as simple as changing the color of text when a user hovers over it or as complex as animating text along a predefined path. 2. Why Use CSS Text Animations? Text animations can make your website more engaging and interactive, which can help in attracting and retaining visitors. They can be used to draw attention to important information, guide users through the site, and create a more memorable user experience. Moreover, with the capabilities of modern browsers, implementing these animations has become easier and more efficient. 3. Basic CSS Animations Concepts Keyframes Keyframes define the start and end points of an animation, as well as any intermediate steps. They are specified using the @keyframes rule in CSS. @keyframes example { 0% { color: black; } 100% { color: red; } } Transitions Transitions provide a way to change property values smoothly over a given duration. They are ideal for hover effects and other simple animations. .element { transition: color 0.5s; } .element:hover { color: red; } Animation Properties Several CSS properties control animations, such as animation-name, animation-duration, animation-timing-function, animation-delay, and more. .element { animation-name: example; animation-duration: 4s; } Simple CSS Text Animations Hover Effects One of the simplest ways to animate text is to change its appearance when a user hovers over it. .hover-effect { transition: color 0.3s ease-in-out; } .hover-effect:hover { color: blue; } Blinking Text Although often discouraged for accessibility reasons, blinking text can be achieved with keyframes. @keyframes blink { 50% { opacity: 0; } } .blinking-text { animation: blink 1s infinite; } Fading Text Fading text in and out is a smooth and appealing effect. @keyframes fade { from { opacity: 0; } to { opacity: 1; } } .fading-text { animation: fade 2s ease-in-out; } Intermediate CSS Text Animations Sliding Text Sliding text animations can be used to create a scrolling marquee effect or bring in text from off-screen. @keyframes slide-in { from { transform: translateX(-100%); } to { transform: translateX(0); } } .sliding-text { animation: slide-in 1s ease-out; } Typing Text Effect This effect mimics the look of text being typed out one character at a time. @keyframes typing { from { width: 0; } to { width: 100%; } } .typing-text { overflow: hidden; white-space: nowrap; border-right: 2px solid; width: 0; animation: typing 4s steps(40, end) forwards, blink-caret 0.75s step-end infinite; } @keyframes blink-caret { from, to { border-color: transparent; } 50% { border-color: black; } } Text Shadow Animation Animating text shadows can create a glowing or pulsating effect. @keyframes shadow-pulse { 0% { text-shadow: 0 0 5px red; } 50% { text-shadow: 0 0 20px yellow; } 100% { text-shadow: 0 0 5px red; } } .shadow-pulse { animation: shadow-pulse 2s infinite; } Advanced CSS Text Animations 3D Text Effects Creating a 3D effect can give your

Blog

ransforming Communication in the Digital Age

Voice Recording: Transforming Communication in the Digital Age In the rapidly evolving landscape of digital communication, voice recording technology has emerged as a game-changer, revolutionizing the way we capture, share, and preserve spoken words. This technology, which allows users to record and playback audio, has become an integral part of both personal and professional life, offering a myriad of applications from casual voice memos to sophisticated business solutions. The journey of voice recording from its rudimentary beginnings to its present-day sophistication is a testament to the relentless march of technological innovation. This comprehensive introduction delves into the history, development, and multifaceted applications of voice recording technology, exploring its profound impact on various aspects of modern life. The Evolution of Voice Recording Technology The story of voice recording begins in the late 19th century with the invention of the phonograph by Thomas Edison in 1877. This groundbreaking device, which recorded sound onto a tinfoil-covered cylinder, marked the first time human voices and other sounds could be captured and replayed. Edison’s phonograph opened the door to a new era of audio technology, but it was just the beginning. Over the next few decades, numerous inventors and engineers built on Edison’s work, leading to the development of more advanced recording media, such as vinyl records, magnetic tape, and eventually digital recording formats. The transition from analog to digital recording in the late 20th century was a pivotal moment in the history of voice recording. Digital technology offered significant improvements in sound quality, durability, and ease of use. Compact discs (CDs) and digital audio tapes (DATs) became popular, followed by the advent of MP3s and other digital audio file formats, which made it possible to store and distribute high-quality audio recordings more efficiently than ever before. This digital revolution laid the groundwork for the modern voice recording devices and software that are now ubiquitous in our daily lives. Techniques, Tips, and Inspiration Modern Voice Recording Devices and Software Today, voice recording technology is more accessible and versatile than ever. Smartphones, laptops, and dedicated voice recorders offer built-in recording capabilities that are easy to use and produce high-quality audio. These devices often come with sophisticated software that allows users to edit and enhance their recordings with a few simple taps or clicks. In addition to standalone devices, a plethora of voice recording apps and programs are available, catering to a wide range of needs from simple voice memos to professional-grade audio production. Popular voice recording apps like Apple’s Voice Memos, Google Keep, and Evernote have made it easy for anyone with a smartphone to capture their thoughts on the go. For those who require more advanced features, software such as Audacity, Adobe Audition, and GarageBand offer powerful tools for recording, editing, and mixing audio. These programs provide users with a comprehensive suite of features, including multi-track recording, noise reduction, and audio effects, making them ideal for podcasters, musicians, and audio engineers. Applications of Voice Recording in Various Sectors Voice recording technology has found applications in a multitude of sectors, profoundly influencing the way we work, learn, and communicate. Here are some of the most significant areas where voice recording is making an impact: Business and Professional Communication In the business world, voice recording is an invaluable tool for capturing meetings, interviews, and conferences. It ensures that important discussions and decisions are accurately documented, reducing the risk of misunderstandings and providing a reliable reference for future use. Many businesses also use voice recording for training purposes, creating audio materials that can be easily distributed to employees. Additionally, call centers and customer service departments rely on voice recording to monitor and improve service quality. Education and E-Learning Voice recording has transformed the educational landscape by making it easier for teachers and students to capture and review lectures, presentations, and discussions. Recorded lectures provide a valuable resource for students who can revisit complex topics at their own pace. E-learning platforms and online courses often incorporate voice recordings to enhance the learning experience, offering an auditory complement to written materials. This technology also supports language learning, allowing students to practice pronunciation and listening skills. Healthcare and Medical Documentation In healthcare, voice recording plays a crucial role in medical documentation. Doctors and other healthcare professionals use voice recorders to dictate patient notes, which are then transcribed into electronic health records (EHRs). This practice not only saves time but also helps ensure accuracy and completeness in medical records. Voice recording is also used in telemedicine, enabling remote consultations and follow-up care. Journalism and Media Production For journalists and media professionals, voice recording is an essential tool for capturing interviews, press conferences, and on-the-scene reports. High-quality audio recordings are crucial for producing clear and engaging news stories, podcasts, and documentaries. Voice recording also facilitates the transcription process, making it easier to convert spoken words into written text for articles and scripts. Legal and Law Enforcement In the legal field, voice recording is used to document depositions, court proceedings, and client interviews. Recorded evidence is often critical in legal cases, providing an accurate account of testimonies and statements. Law enforcement agencies use voice recording for various purposes, including interrogations, surveillance, and communication during operations. These recordings can be vital in investigations and legal proceedings. Personal Use and Creative Projects On a personal level, voice recording is a popular way to capture thoughts, ideas, and memories. People use voice memos to jot down reminders, record personal reflections, and create audio diaries. Creative individuals, such as writers and musicians, use voice recording to capture spontaneous inspiration and draft new works. Podcasts and audiobooks have also become a major form of entertainment and information, driven by advancements in voice recording technology. The Future of Voice Recording Technology As technology continues to advance, the future of voice recording looks promising, with several trends and innovations on the horizon. Artificial intelligence (AI) and machine learning are poised to play a significant role in the evolution of voice recording. AI-powered transcription services, such as Otter.ai and Rev, are

Blog

Techniques, Tips, and Inspiration

Introduction Character painting is a fascinating and intricate art form that brings life to imagined or real personas through the medium of paint. This blog will delve into the world of character painting, exploring its history, techniques, tools, and the creative process involved. Whether you are a beginner seeking to learn the basics or an experienced artist looking to refine your skills, this comprehensive guide will provide valuable insights and inspiration. The History and Evolution of Character Painting Character painting has a rich history that dates back to ancient civilizations. From the elaborate frescoes of the Egyptians to the detailed portraits of the Renaissance, artists have long sought to capture the essence of human figures. This section will explore key periods and influential artists who have shaped the art of character painting over the centuries. Essential Tools and Materials A successful character painting begins with the right tools and materials. Here, we will discuss the various types of paints, brushes, canvases, and other supplies that are essential for character painting. Understanding the properties and uses of these materials can significantly impact the outcome of your work. Fundamental Techniques of Character Painting Mastering the fundamental techniques is crucial for any aspiring character painter. This section will cover basic principles such as proportion, anatomy, and perspective, as well as more advanced techniques like shading, blending, and color theory. Step-by-step tutorials and examples will help you grasp these concepts and apply them to your own work. Developing Your Unique Style Every artist has a unique style that sets their work apart. In this part of the blog, we will explore ways to discover and develop your personal artistic voice. From experimenting with different techniques to studying various art styles, finding your niche in character painting can be a rewarding journey. The Creative Process: From Concept to Completion The creative process of character painting involves several stages, from initial concept and sketching to the final touches. We will walk you through this process, providing tips and insights at each stage to help you bring your characters to life. Understanding this workflow can streamline your efforts and improve your overall results. Overcoming Common Challenges Character painting can present various challenges, from technical issues to creative blocks. This section will address common problems that artists face and offer practical solutions to overcome them. Learning to navigate these challenges can enhance your skills and keep your creative momentum going. Inspirational Case Studies Sometimes, the best way to learn is by studying the work of others. We will highlight several case studies of renowned character painters, examining their techniques, styles, and the stories behind their masterpieces. These examples can provide valuable inspiration and insight into the art of character painting. Building a Portfolio and Sharing Your Work Creating a portfolio is an essential step for any artist looking to showcase their work. This section will provide tips on how to compile a professional portfolio, whether for personal satisfaction or to attract potential clients and galleries. Additionally, we will discuss ways to share your work online and build an audience through social media and other platforms. Zipping Up a Jacket: An In-Depth Guide Introduction Zipping up a jacket is a simple, everyday task that many people take for granted. However, this seemingly mundane activity involves a fascinating blend of design, engineering, and practical skill. In this long-form blog post, we will explore the intricacies of zipping up a jacket, including the history of the zipper, the mechanics behind it, the different types of zippers, and tips for ensuring a smooth zip every time. Whether you’re curious about the evolution of this essential fastener or looking for solutions to common zipper problems, this comprehensive guide has you covered. The History of the Zipper The zipper, an invention that revolutionized clothing and countless other products, has a rich history. The first concept of the zipper dates back to the mid-19th century, with several inventors contributing to its development. This section will trace the zipper’s evolution from Elias Howe’s initial idea to Whitcomb Judson’s “clasp locker” and Gideon Sundback’s improvements that led to the modern zipper. Understanding the zipper’s history provides valuable insight into its significance and widespread use today. How Zippers Work: The Mechanics Behind the Magic At first glance, zipping up a jacket seems straightforward, but the mechanics behind it are quite ingenious. This part of the blog will delve into how zippers function, explaining the interaction between the slider, teeth, and tape. We will break down the process step-by-step, highlighting the role of each component and how they work together to create a secure closure. Additionally, we will discuss the different materials used in zipper manufacturing and how they impact performance and durability. A Comprehensive Guide to Automated Test Reporting Types of Zippers: A Comprehensive Overview Zippers come in various types, each suited for different applications. In this section, we will explore the main types of zippers, including coil zippers, metal zippers, plastic-molded zippers, and invisible zippers. We will discuss their unique characteristics, advantages, and typical uses. Whether you’re selecting a zipper for a new jacket or repairing an old one, understanding the different types will help you make an informed choice. The Art of Zipping Up: Techniques and Tips Zipping up a jacket might seem like a no-brainer, but there are techniques to ensure it’s done smoothly and efficiently. Here, we will share practical tips for aligning the zipper properly, avoiding snags, and dealing with stiff or sticky zippers. We will also cover common issues like zipper separation and how to fix them. These insights will help you master the art of zipping up a jacket, making the process hassle-free. Common Zipper Problems and Solutions Even the best zippers can encounter problems. This section will address common zipper issues such as stuck zippers, misaligned teeth, and broken sliders. We will provide detailed troubleshooting steps and repair methods to resolve these problems. From quick fixes to more involved repairs, you’ll learn how to extend the life of your

Blog

A Comprehensive Guide to Automated Test Reporting

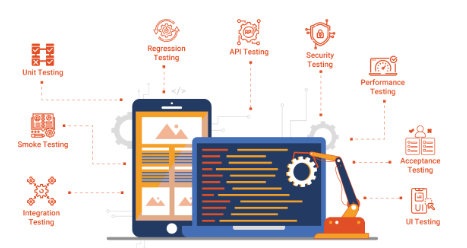
Introduction (Animated): Begin with a captivating introduction that sets the stage for why automated A Comprehensive Guide to Automated Test Reporting test reporting is crucial in modern software development. You can create a metaphorical animation in words, illustrating how reports breathe life into raw testing data, transforming it into actionable insights. Mention the challenges developers face without robust reporting tools and how Extent Reports in Selenium emerges as a beacon of clarity in this landscape. What Are CSS Animations? Table of Contents: Understanding Extent Reports Definition and Purpose Benefits of Using Extent Reports Setting Up Selenium and Extent Reports Installing Selenium WebDriver Integrating Extent Reports into Your Selenium Project Configuration and Initialization Creating Your First Extent Report Setting Test Parameters Adding Test Logs Capturing Screenshots Enhancing Your Reports with Visuals Adding Charts and Graphs Integrating Custom Visual Components Advanced Reporting Techniques Logging Test Steps Handling Test Dependencies Customizing Report Views Integrating Extent Reports with TestNG Leveraging TestNG Annotations Grouping and Categorizing Tests Generating Historical Reports Archiving Reports Version Control and Historical Analysis Best Practices for Extent Reports Maintaining Clean and Readable Reports Performance Considerations Troubleshooting and Debugging Common Issues and Solutions Debugging Report Generation Failures Conclusion Recap of Extent Reports Benefits Future Trends and Developments in Automated Reporting Detailed Content Expansion: Understanding Extent Reports: Define what Extent Reports are, their purpose in Selenium testing, and why they are preferred over other reporting mechanisms. Setting Up Selenium and Extent Reports: Provide a step-by-step guide on installing Selenium WebDriver, downloading Extent Reports dependencies, and integrating them into a Java project. Creating Your First Extent Report: Walk through the process of initializing a basic Extent Report, setting up test parameters, logging test steps, and capturing screenshots. Enhancing Your Reports with Visuals: Explain how to enhance reports with visual components like charts, graphs, and custom visuals for better data representation. Advanced Reporting Techniques: Dive deeper into advanced features such as logging detailed test steps, handling test dependencies, and customizing report views to suit project needs. Integrating Extent Reports with TestNG: Show how to integrate Extent Reports seamlessly with TestNG, leveraging annotations, and organizing tests effectively. Generating Historical Reports: Discuss strategies for archiving reports, maintaining version control, and analyzing historical test data. Best Practices for Extent Reports: Provide tips on maintaining clean and readable reports, optimizing report generation performance, and adhering to coding standards. Troubleshooting and Debugging: Address common issues that arise during Extent Reports implementation and offer troubleshooting tips and solutions. Conclusion: Summarize the key benefits of Extent Reports, reiterate their importance in Selenium testing, and speculate on future trends in automated reporting. Title: Demystifying Extent Reports: The Ultimate Guide to Automated Test Reporting Introduction: In the realm of software development, where precision and reliability are paramount, the ability to effectively report and analyze test results is crucial. This is where automated test reporting tools like Extent Reports step in, offering developers and QA teams a powerful mechanism to transform raw testing data into meaningful insights. This comprehensive guide explores everything you need to know about Extent Reports, from its fundamental concepts to advanced techniques, equipping you with the knowledge to leverage this tool effectively in your projects. Table of Contents: Introduction to Automated Test Reporting Importance and Benefits Evolution of Test Reporting Tools Understanding Extent Reports Definition and Purpose Key Features and Advantages Getting Started with Extent Reports Installation and Setup Integration with Selenium and TestNG Creating Your First Extent Report Initializing a Basic Report Adding Test Steps and Logs Customizing Report Appearance Enhancing Reports with Visuals Charts, Graphs, and Visual Components Screenshots and Interactive Elements Advanced Features and Customization Logging Test Dependencies Historical and Comparative Reports Custom Templates and Themes Integrating Extent Reports into CI/CD Pipelines Automation and Continuous Integration Analyzing Reports in CI/CD Environments Best Practices for Using Extent Reports Structuring Reports Effectively Optimization Tips for Performance Troubleshooting and Debugging Common Issues and Solutions Debugging Report Generation Failures Future Trends and Innovations Emerging Technologies in Test Reporting Predictions for Extent Reports Conclusion Recap of Extent Reports Benefits Final Thoughts on Automated Test Reporting Detailed Content Expansion: Introduction to Automated Test Reporting: Discuss the significance of automated test reporting in ensuring software quality, improving efficiency, and reducing time-to-market. Highlight the evolution from manual reporting to automated tools and their impact on modern development practices. Understanding Extent Reports: Define Extent Reports as a comprehensive Java library for creating interactive and detailed test reports. Explain its primary purpose of aggregating test results, enhancing visibility, and aiding decision-making in QA processes. Getting Started with Extent Reports: Provide step-by-step instructions on installing Extent Reports, configuring dependencies, and integrating it with popular frameworks like Selenium WebDriver and TestNG. Include code snippets and screenshots for clarity. Creating Your First Extent Report: Walk through the process of setting up and initializing a basic Extent Report, adding test steps, logs, and customizing the report layout and design according to project requirements. Enhancing Reports with Visuals: Explore the capabilities of Extent Reports in visual data representation, including the integration of charts, graphs, screenshots, and interactive elements to improve readability and analysis. Advanced Features and Customization: Discuss advanced features such as logging test dependencies, generating historical and comparative reports, and customizing report templates and themes to align with organizational branding and reporting standards. Integrating Extent Reports into CI/CD Pipelines: Explain strategies for integrating Extent Reports into Continuous Integration and Continuous Deployment pipelines, automating report generation, and utilizing reports effectively for rapid feedback loops. Best Practices for Using Extent Reports: Provide best practices for structuring reports effectively, optimizing performance during report generation, and ensuring consistency and clarity in report content and presentation. Troubleshooting and Debugging: Address common issues that users may encounter when setting up or using Extent Reports, and offer troubleshooting steps, tips, and solutions to resolve these issues promptly. Future Trends and Innovations: Explore emerging trends in automated test reporting, advancements in Extent Reports functionality, and predictions for how these tools will evolve to meet future challenges and opportunities in software testing. Conclusion: Summarize the benefits of using Extent Reports,

Blog

What Are CSS Animations?

Introduction Welcome to our deep dive into the world of CSS animations! If you’ve ever What Are CSS Animations?  marveled at the smooth transitions, engaging hover effects, and dynamic visual elements on modern web pages, you’ve witnessed the power of CSS animations. This blog post will guide you through the fundamentals, intricacies, and advanced techniques of CSS animations, helping you transform static web elements into lively, interactive experiences. The Basics of CSS Animations CSS (Cascading Style Sheets) animations allow developers to create transitions and effects that bring web pages to life without relying on JavaScript or other programming languages. These animations are made possible by defining a sequence of keyframes and using CSS properties to control their appearance, timing, and behavior. TVPaint Animation Course Welcome to the Ultimate Understanding Keyframes Keyframes are the building blocks of CSS animations. They define the start and end points of an animation, as well as any intermediate steps. Each keyframe specifies a snapshot of the style at a particular moment in the animation sequence. By chaining multiple keyframes together, you can create complex and fluid animations. Here’s an example of a simple keyframe definition: @keyframes example { from { opacity: 0; } to { opacity: 1; } } In this example, the example animation gradually changes the opacity of an element from 0 (completely transparent) to 1 (fully opaque). Applying Animations to Elements To apply an animation to an element, you use the animation property. This property is a shorthand for several sub-properties that control different aspects of the animation, such as its duration, timing function, delay, and iteration count. Here’s how you can apply the example animation to a CSS class: .fade-in { animation: example 2s ease-in-out; } In this case, elements with the fade-in class will gradually appear over 2 seconds with an ease-in-out timing function, which provides a smooth acceleration and deceleration. Delving Deeper into Animation Properties CSS animations are highly customizable, thanks to a wide range of properties that you can tweak to achieve the desired effect. Let’s explore some of the most important ones: Animation Duration The animation-duration property specifies how long an animation takes to complete one cycle. You can set this property using time values such as seconds (s) or milliseconds (ms). .fade-in { animation-duration: 2s; } Animation Timing Function The animation-timing-function property controls the speed curve of the animation. It defines how the intermediate values of the animation are calculated. Common timing functions include linear, ease, ease-in, ease-out, and ease-in-out. .fade-in { animation-timing-function: ease-in-out; } Animation Delay The animation-delay property specifies a delay before the animation starts. This can be useful for sequencing multiple animations or creating a staggered effect. .fade-in { animation-delay: 1s; } Animation Iteration Count The animation-iteration-count property determines how many times an animation should repeat. You can set it to a specific number or use the infinite keyword for continuous looping. .fade-in { animation-iteration-count: infinite; } Animation Direction The animation-direction property specifies whether the animation should play in reverse on alternate cycles. This can create a ping-pong effect, making the animation more dynamic .fade-in { animation-direction: alternate; } Animation Fill Mode The animation-fill-mode property defines the style of the element before the animation starts and after it ends. It can take values like none, forwards, backwards, and both. .fade-in { animation-fill-mode: forwards; } Advanced Techniques and Tips While the basics of CSS animations are straightforward, mastering advanced techniques can take your web designs to the next level. Here are some tips and tricks for creating more sophisticated animations: Combining Multiple Animations You can apply multiple animations to an element by separating them with commas. This allows you to layer effects and create intricate sequences. .multi-effect { animation: fade-in 2s ease-in-out, slide-in 1s ease-out; } Using Animation Shorthand The animation shorthand property lets you define multiple properties in a single line, making your CSS more concise and readable. .fade-in { animation: example 2s ease-in-out 1s infinite alternate forwards; } Creating Responsive Animations To ensure your animations look great on all devices, consider using relative units (such as em or rem) and media queries to adjust animation properties based on screen size. @media (max-width: 600px) { .responsive-animation { animation-duration: 1s; } } Optimizing Performance Animations can be performance-intensive, especially on low-end devices. To optimize performance, follow these best practices: Use transform and opacity properties, as they are less resource-heavy. Avoid animating properties that trigger layout changes, like width and height. Use will-change property to hint the browser about the elements that will be animated. .optimized { will-change: transform, opacity; } Leveraging CSS Variables CSS variables (custom properties) can be used to create more flexible and reusable animations. By defining variables for key animation properties, you can easily update multiple animations from a single place. :root { –animation-duration: 2s; –animation-timing: ease-in-out; } .variable-animation { animation: example var(–animation-duration) var(–animation-timing); } Real-World Examples and Case Studies To see CSS animations in action, let’s look at some real-world examples and case studies. These will illustrate how various techniques and best practices can be applied to create engaging web experiences. Example 1: Button Hover Effect A simple yet effective use of CSS animations is enhancing button interactions. By adding a subtle hover effect, you can make buttons more visually appealing and provide feedback to users. .button { background-color: #3498db; color: white; padding: 10px 20px; border: none; cursor: pointer; transition: background-color 0.3s ease; } .button:hover { background-color: #2980b9; } Example 2: Animated Loading Spinner Loading spinners are a common feature on web pages. CSS animations can be used to create smooth and visually pleasing spinners without relying on images or JavaScript. .spinner { border: 4px solid rgba(0, 0, 0, 0.1); border-top: 4px solid #3498db; border-radius: 50%; width: 40px; height: 40px; animation: spin 1s linear infinite; } @keyframes spin { 0% { transform: rotate(0deg); } 100% { transform: rotate(360deg); } } Example 3: Parallax Scrolling Effect Parallax scrolling creates an illusion of depth by moving background and foreground elements at different speeds. This effect can be achieved with CSS animations

Blog

TVPaint Animation Course Welcome to the Ultimate

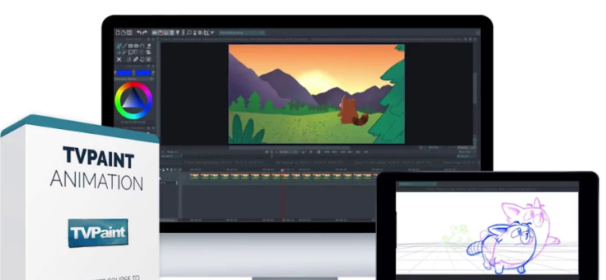
Introduction Welcome to the Ultimate TVPaint TVPaint Animation Course TVPaint Animation Course Welcome to the Ultimate Introduction In the ever-evolving world of animation, staying ahead of the curve is crucial. As technology advances, so does the software that powers our creative endeavors. One such powerful tool is TVPaint Animation, a versatile and professional-grade software that has revolutionized the animation industry. Whether you’re a seasoned animator or a budding artist, mastering TVPaint can open doors to new creative possibilities and professional opportunities. This blog serves as an in-depth introduction to our comprehensive TVPaint Animation Course, designed to guide you from the basics to advanced techniques. Over the next several sections, we will explore what TVPaint Animation is, its features, why it stands out among other animation software, and what you can expect from our course. What is TVPaint Animation? TVPaint Animation is a raster-based animation software developed by TVPaint Developpement. It was originally released in 1991, and over the decades, it has grown to become a preferred choice for professional animators across the globe. Unlike vector-based software such as Adobe Animate or Toon Boom Harmony, TVPaint Animation focuses on bitmap graphics, giving animators the ability to create detailed and painterly animations. Key Features of TVPaint Animation Versatility: TVPaint supports both 2D and stop-motion animation, making it a versatile tool for various animation styles. Brush Engine: One of the standout features of TVPaint is its robust brush engine, allowing artists to create custom brushes that mimic traditional media like watercolor, oil paint, and pencil. Layers and Blending Modes: Similar to Photoshop, TVPaint offers multiple layers and blending modes, providing animators with immense control over their creations. Onion Skinning: This classic animation tool helps artists see multiple frames at once, aiding in creating smooth transitions. Timeline and Storyboard: The software includes an intuitive timeline and storyboard tools, streamlining the animation process from initial concept to final production. Why Choose TVPaint Over Other Animation Software? With so many animation tools available, why should one consider TVPaint Animation? Here are a few reasons: Introduction to Animate Animation Course 1. Traditional Feel TVPaint is renowned for its ability to replicate the feel of traditional animation. For animators who prefer hand-drawn techniques, the software offers an authentic experience that is difficult to match. The extensive range of brushes and the ability to draw directly onto frames make it an excellent choice for those who appreciate the classic animation methods. 2. Professional Recognition TVPaint is used by leading animation studios worldwide, including major players like Cartoon Network, Nickelodeon, and Studio Ghibli. Its industry recognition speaks volumes about its capabilities and reliability. Learning TVPaint can thus provide you with a competitive edge in the job market. 3. Comprehensive Toolset From sketching and storyboarding to final compositing, TVPaint covers all stages of the animation process. This all-in-one approach means you don’t need to switch between multiple software packages, making your workflow more efficient and cohesive. 4. Customization and Flexibility TVPaint allows extensive customization, from brushes and textures to workspace layouts. This flexibility enables animators to tailor the software to their specific needs and preferences, enhancing productivity and comfort. Course Overview: What to Expect Our TVPaint Animation Course is meticulously designed to cater to various skill levels. Whether you’re starting from scratch or looking to refine your skills, our curriculum covers everything you need to become proficient in TVPaint. Module 1: Introduction to TVPaint Installation and Setup: Getting started with TVPaint, system requirements, and initial setup. Interface Overview: Navigating the interface, understanding the toolbars, and customizing your workspace. Basic Drawing Tools: Introduction to the essential drawing tools and techniques. Module 2: Fundamental Animation Techniques Frame-by-Frame Animation: Basics of traditional animation, keyframes, and in-between frames. Onion Skinning: Utilizing onion skinning for smoother transitions and more fluid animations. Timing and Spacing: Understanding the principles of timing and spacing to create believable motion. Module 3: Advanced Drawing and Painting Brush Customization: Creating and customizing brushes to suit different styles and techniques. Texture and Detail: Adding texture and fine details to your animations. Color Theory: Applying color theory to enhance the visual appeal of your work. Module 4: Storyboarding and Layouts Storyboarding Basics: Creating effective storyboards to plan your animations. Layout Design: Designing layouts that complement your story and characters. Camera Movements: Simulating camera movements to add dynamism to your animations. Introduction to Character Animator Animation Course Welcome to the exciting world of animation! If you’ve ever dreamed of bringing your characters to life with seamless, captivating movements, this course is for you. Our Character Animator Animation Course is designed to guide you through the fundamentals and advanced techniques of character animation, utilizing the powerful tools and features of Adobe Character Animator. Whether you’re a beginner eager to start your animation journey or a seasoned artist looking to refine your skills, this course offers something for everyone. What is Adobe Character Animator? Adobe Character Animator is a dynamic and intuitive software that allows users to animate characters in real time. It integrates with other Adobe Creative Cloud applications, making it a versatile tool for animators. With features like facial recognition, lip-syncing, and body tracking, Character Animator simplifies the animation process, allowing creators to produce professional-quality animations efficiently. Course Overview Our Character Animator Animation Course is structured to provide a comprehensive learning experience. Here’s what you can expect: Module 1: Introduction to Character Animation Understanding Animation Basics: Principles of animation: squash and stretch, anticipation, staging, etc. History of animation and its evolution. Getting Started with Character Animator: Introduction to the software interface. Setting up your workspace. Basic tools and their functions. Module 2: Creating and Importing Characters Designing Characters: Character design principles. Sketching and refining your characters. Importing Characters into Character Animator: Preparing your character in Adobe Photoshop or Illustrator. Importing and rigging characters in Character Animator. Module 3: Rigging and Preparing for Animation Rigging Basics: Understanding character rigs. Setting up puppet pins and behaviors. Advanced Rigging Techniques: Creating complex rigs for advanced animations. Using triggers and swap sets for dynamic movements. Module 4: Animation

Scroll to Top