Blog

Introduction to Animate Animation Course

Introduction Unleashing Creativity Through Animation: Introduction to Animate Animation Course An Introduction to Our Animate Animation Course Animation has become a ubiquitous part of modern media, from blockbuster films to engaging web content. It is a powerful storytelling tool that brings characters and scenes to life, capturing the imagination of audiences worldwide. As the demand for skilled animators continues to grow, learning the art and techniques of animation has never been more relevant or rewarding. Our Animate Animation Course is designed to equip aspiring animators with the knowledge and skills they need to thrive in this dynamic field. Why Animation? Animation is not just about drawing; it’s about creating movement and bringing ideas to life. It combines art with technology, imagination with technique, and creativity with precision. The appeal of animation lies in its ability to transcend the limitations of the real world, offering endless possibilities for expression and innovation. Whether you’re interested in creating animated films, video games, advertisements, or educational content, the foundational skills you’ll gain from our course will be invaluable. iPad Animation Course Master the Art What is Animate? Animate is a leading software in the world of animation, known for its powerful features and versatility. Developed by Adobe, Animate offers a comprehensive suite of tools for creating interactive animations for web, TV, and mobile platforms. It supports various animation techniques, including traditional frame-by-frame animation, tweening, and even advanced features like bone rigging. With its robust set of features, Animate provides the perfect platform for both beginners and seasoned animators to bring their visions to life. Course Overview Our Animate Animation Course is structured to guide you from the basics of animation to more advanced techniques, ensuring a well-rounded understanding of the software and the art of animation. Here’s what you can expect: Module 1: Introduction to Animation Understanding the basics of animation and its history Exploring different types of animation (2D, 3D, stop-motion) Learning about the animation pipeline Module 2: Getting Started with Animate Navigating the Animate interface Understanding the tools and workspace Setting up your first animation project Module 3: Basic Animation Techniques Creating simple animations using keyframes and tweens Understanding motion paths and easing Working with layers and symbols Module 4: Intermediate Animation Skills Character design and rigging Creating complex animations using nested symbols and timeline effects Adding interactivity with ActionScript and JavaScript Module 5: Advanced Techniques and Special Effects Using advanced features like bone tool and IK armatures Incorporating sound and audio synchronization Applying filters and special effects Module 6: Final Project and Portfolio Development Developing a final animation project from concept to completion Creating a professional portfolio to showcase your work Tips for presenting and promoting your animations Why Choose Our Course? Our Animate Animation Course stands out for several reasons: Experienced Instructors Our instructors are seasoned professionals with years of experience in the animation industry. They bring real-world insights and practical knowledge to the classroom, ensuring that you gain not just theoretical understanding but also practical skills that are in demand. Hands-On Learning We believe in learning by doing. Our course is packed with hands-on exercises and projects that allow you to apply what you’ve learned immediately. This approach helps reinforce your understanding and builds your confidence in using Animate. Comprehensive Curriculum Our curriculum is meticulously designed to cover all aspects of animation using Animate. From basic concepts to advanced techniques, you’ll gain a thorough understanding of the software and the principles of animation. Supportive Learning Environment We provide a supportive and collaborative learning environment where you can interact with instructors and fellow students. Our goal is to foster a community of learners who can share ideas, provide feedback, and grow together. What You Will Learn By the end of our Animate Animation Course, you will: Have a solid understanding of the principles of animation Be proficient in using Adobe Animate to create various types of animations Be able to design and animate characters and environments Understand how to add interactivity and special effects to your animations Have a portfolio of work that demonstrates your skills and creativity Who Should Enroll? Our course is ideal for: Aspiring animators looking to break into the industry Graphic designers and illustrators wanting to expand their skill set Web designers and developers interested in creating animated web content Educators and content creators looking to produce engaging educational materials Anyone with a passion for animation and storytelling The Future of Animation The future of animation is bright and full of potential. With advancements in technology and increasing demand for high-quality animated content, the skills you acquire in our course will open up numerous opportunities. From working in film and television to game design and advertising, the possibilities are endless. Enroll Today If you’re ready to embark on a creative journey and transform your passion for animation into a rewarding career, our Animate Animation Course is the perfect place to start. Enroll today and take the first step towards becoming a skilled animator. We look forward to seeing the amazing animations you will create! Mastering Animation: An In-Depth Guide to Toon Boom Harmony Welcome to our comprehensive Toon Boom Harmony Animation Course! Whether you’re a budding animator looking to break into the industry or a seasoned professional aiming to refine your skills, this course is designed to guide you through the powerful features and capabilities of Toon Boom Harmony, one of the most robust animation software in the market. What is Toon Boom Harmony? Toon Boom Harmony is an industry-standard animation software used by professionals around the world. Known for its versatility, Harmony allows animators to create high-quality 2D animations with a wide range of tools and features. Whether you’re working on a traditional hand-drawn animation, a cut-out animation, or something in between, Harmony has the tools you need to bring your vision to life. Why Choose Toon Boom Harmony? Professional-Grade Tools: Harmony is used by top studios in the industry, including Disney, Nickelodeon, and Cartoon Network. It’s the software behind many of the animated

Blog

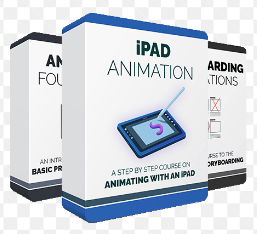
iPad Animation Course Master the Art

Introduction Unleash Your Creativity with iPad Animation In the age of digital creativity, the iPad has emerged as a powerful iPad Animation Course Master the Art tool for artists, designers, and animators. Its portability, combined with a suite of sophisticated apps, makes it an ideal platform for creating stunning animations. Whether you’re a beginner eager to explore the world of animation or an experienced animator looking to streamline your workflow, our iPad Animation Course is designed to help you harness the full potential of this versatile device. The Rise of iPad Animation The animation landscape has evolved dramatically over the past decade. Traditional methods have given way to digital techniques that offer greater flexibility and efficiency. The iPad, with its intuitive interface and advanced capabilities, has revolutionized the way animators work. From hand-drawn animations to 3D modeling, the iPad provides a canvas where imagination meets technology. Why Choose the iPad for Animation? Portability and Convenience: Unlike bulky desktop setups, the iPad allows you to animate anywhere, anytime. Whether you’re commuting, traveling, or relaxing at home, your creative studio is always at your fingertips. Powerful Apps: Apps like Procreate, Animation Desk, and LumaFusion bring professional-grade tools to your iPad. These applications are equipped with features that rival those of traditional animation software, enabling you to produce high-quality animations with ease. Apple Pencil Integration: The Apple Pencil is a game-changer for digital artists. Its precision and responsiveness make it an indispensable tool for animators, allowing for intricate detailing and smooth, fluid motion. Seamless Workflow: The iPad’s ecosystem, including iCloud and compatibility with other Apple devices, ensures a smooth and efficient workflow. You can easily transfer files, collaborate with others, and access your work from multiple devices. The Nickelodeon Ident: A Journey Through What You’ll Learn in Our Course Our iPad Animation Course is meticulously crafted to cater to both novices and seasoned professionals. Here’s a glimpse of what you can expect: Fundamentals of Animation: Understand the basic principles of animation, including timing, spacing, and keyframes. Learn how to apply these principles to create lifelike movements and captivating scenes. Mastering Animation Apps: Get hands-on experience with top animation apps like Procreate, Animation Desk, and RoughAnimator. We’ll guide you through the features and functionalities of each app, ensuring you can maximize their potential. Character Design and Storyboarding: Dive into character design, exploring techniques for creating unique and expressive characters. Learn the art of storyboarding to plan and visualize your animation sequences effectively. Animating Scenes and Backgrounds: Discover how to bring scenes and backgrounds to life. We’ll cover perspective, lighting, and shading techniques to enhance the depth and realism of your animations. Advanced Techniques and Special Effects: Elevate your animations with advanced techniques and special effects. From adding dynamic lighting and shadows to incorporating visual effects, you’ll learn how to make your animations stand out. Exporting and Sharing Your Work: Learn the best practices for exporting your animations in various formats. We’ll also show you how to share your creations on social media platforms, build a portfolio, and even monetize your work. Who Should Enroll? Our course is designed for a wide audience, including: Aspiring Animators: If you’re new to animation, this course will provide you with a solid foundation and the skills needed to start your journey. Digital Artists: Enhance your existing skills and explore new creative possibilities with iPad animation. Educators and Students: Incorporate animation into your teaching or learning process, making it more engaging and interactive. Professional Animators: Streamline your workflow and discover new techniques to enhance your professional projects. Join Our Community When you enroll in our iPad Animation Course, you become part of a vibrant community of artists and animators. You’ll have access to: Exclusive Online Forums: Connect with fellow students, share your work, and receive feedback. Live Q&A Sessions: Participate in live sessions with our instructors to ask questions and gain deeper insights. Continuous Updates: Stay updated with the latest trends and techniques in animation through our regular course updates and additional resources. Different Animation Apps in 1 Course: Master Animation on Your iPad Unlock the World of Animation with Your iPad Animation has become an integral part of digital storytelling, marketing, and entertainment. With the advent of powerful tools and devices, creating high-quality animations is now more accessible than ever. The iPad, in particular, stands out as a versatile and portable platform for animation, equipped with a range of sophisticated apps that cater to various styles and techniques. Welcome to our comprehensive guide on mastering different animation apps on your iPad in one cohesive course. This course is designed to equip you with the skills and knowledge needed to create stunning animations using the best apps available on the iPad. Whether you’re a beginner or a seasoned animator, this course will help you explore and leverage the unique features of each app to elevate your animation projects. The Power of the iPad in Animation The iPad’s combination of advanced hardware, intuitive touch interface, and powerful software makes it an ideal tool for animators. Here are some key reasons why the iPad is perfect for animation: Portability: The iPad allows you to animate on the go, making it easy to work from anywhere without being tied to a desk. Apple Pencil Integration: The Apple Pencil provides precision and control, essential for detailed and intricate animation work. High-Performance Hardware: The latest iPad models are equipped with powerful processors and high-resolution displays, ensuring smooth and responsive performance. Versatile App Ecosystem: A wide range of animation apps cater to different styles, techniques, and levels of expertise. Overview of the Course Our course is structured to take you through the essential animation apps available on the iPad, providing a thorough understanding of their features and how to use them effectively. Here’s what you can expect: Introduction to iPad Animation: A brief overview of the iPad’s capabilities and why it’s a great tool for animators. App Tutorials and Guides: Detailed tutorials for each app, including Procreate, Animation Desk, RoughAnimator, FlipaClip, and LumaFusion. Techniques

Blog

The Nickelodeon Ident: A Journey Through

Introduction :-The Nickelodeon Ident: A Journey Through Nostalgia  Briefly introduce what a Nickelodeon ident is (station identification) and its significance in television broadcasting. Early Days: Origins and Evolution Discuss the early days of Nickelodeon and how its ident evolved from its inception to the present day. Highlight any significant changes or milestones in its design and presentation. Nostalgia Factor: Impact on Viewers Explore why Nickelodeon idents evoke nostalgia in viewers who grew up watching the channel. Include personal anecdotes or testimonials from fans to illustrate its emotional impact. Art and Design: Analyzing Visual Elements Break down the visual components of a typical Nickelodeon ident. Discuss the art style, color palette, characters, and music choices used to create a memorable ident. Cultural Influence: Beyond Television Examine how Nickelodeon idents have influenced popular culture beyond television. Look at merchandise, fan art, and references in other media that pay homage to these idents. Technological Advancements: Changing with the Times Investigate how technological advancements have influenced the production and presentation of Nickelodeon idents. Compare classic idents with modern ones in terms of animation quality, CGI usage, and digital effects. Fan Community: Celebrating a Shared Experience Highlight the online community of Nickelodeon fans who discuss and share their favorite idents. Mention any fan initiatives or projects related to preserving or recreating idents. Future Prospects: Where Next for Nickelodeon Idents? Speculate on the future of Nickelodeon idents in an era of streaming and digital content consumption. Consider how new technologies and platforms might shape the evolution of station identification. Conclusion Summarize the enduring appeal of Nickelodeon idents and their role in television history. Reflect on what makes these short segments so memorable and beloved by audiences worldwide. how to Preliminary script recording Writing Tips: Ensure each section flows logically from one to the next, maintaining a coherent narrative throughout. Use visuals such as images or videos of different Nickelodeon idents to illustrate your points. Incorporate quotes from experts in animation, television history, or pop culture to add depth to your analysis. Proofread and edit your blog post for clarity, coherence, and accuracy before publishing. Introduction Define what postproduction encompasses (editing, sound design, visual effects, etc.). Highlight its crucial role in refining and finalizing creative projects across different mediums. Discuss the importance of postproduction in delivering high-quality content to audiences. History and Evolution Trace the evolution of postproduction techniques from traditional film editing to digital workflows. Discuss key technological advancements that have revolutionized postproduction processes. Stages of Postproduction Editing: Explore the art of editing, including techniques, tools (software like Adobe Premiere Pro, Final Cut Pro), and the role of editors. Sound Design: Discuss the importance of sound in enhancing storytelling, including Foley, sound effects, and mixing. Visual Effects (VFX): Highlight the impact of VFX in modern cinema and television, from CGI to practical effects. Color Grading: Explain the role of colorists in creating mood and visual coherence in films and videos. Case Studies and Examples Select a few notable films, TV shows, or music videos to analyze their postproduction process. Discuss how specific postproduction techniques contributed to their success or visual identity. Technological Innovations Explore emerging technologies (AI, machine learning, VR/AR) and their impact on postproduction. Discuss how these innovations are shaping the future of creative industries. Challenges and Solutions Address common challenges in postproduction (tight deadlines, budget constraints, creative conflicts). Provide tips and strategies for overcoming these challenges based on industry practices. Collaboration and Teamwork Highlight the collaborative nature of postproduction teams (editors, sound engineers, VFX artists, etc.). Discuss the importance of communication and coordination among team members. Industry Insights and Career Paths Provide insights into careers in postproduction (editor, sound designer, colorist, etc.). Discuss skills and qualifications needed to succeed in the field. Future Trends Speculate on future trends in postproduction, such as remote collaboration, real-time editing, and sustainability. Consider the impact of evolving consumer preferences and technology on postproduction workflows. Conclusion Summarize the key points discussed about postproduction’s role in enhancing creative works. Reflect on its evolving significance in the digital age and its potential for future innovation. Writing Tips: Use real-life examples, anecdotes, and industry statistics to illustrate your points. Break down technical jargon for readers unfamiliar with postproduction processes. Incorporate multimedia elements (images, videos, audio clips) to enhance engagement. Structure your blog post logically, with clear transitions between sections. Purpose of Sound in Postproduction Importance of sound in enhancing viewer experience. Brief overview of how sound affects emotions and storytelling. Scope of the Blog Explanation that the blog will cover various aspects of sound in postproduction. Mention the focus on techniques, tools, and examples. Section 1: Fundamentals of Sound in Postproduction Understanding Sound Design Definition and importance of sound design in filmmaking. Key elements of sound design (dialogue, sound effects, music). Role of a Sound Editor Responsibilities and skills required for a sound editor. Collaboration with other postproduction team members. Section 2: Techniques in Sound Editing Dialogue Editing Importance of clean dialogue tracks. Techniques for removing noise and enhancing clarity. Sound Effects Creation and Editing Creating realistic and impactful sound effects. Layering and mixing different sounds for desired effects. Music Editing Choosing appropriate music tracks. Editing music to fit the pace and mood of the scene. Section 3: Tools and Software for Sound Postproduction Digital Audio Workstations (DAWs) Overview of popular DAWs used in postproduction. Features and capabilities of each software. Plugins and Effects Essential plugins for sound editing (EQ, compression, reverb). Specialty plugins for specific sound design needs. Section 4: Case Studies and Examples Analyzing Effective Sound Design in Films Case studies of well-known films with exceptional sound design. Breakdown of specific scenes and sound techniques used. Section 5: Future Trends and Innovations Emerging Technologies in Sound Postproduction Virtual reality and its impact on sound design. AI and machine learning in automated sound editing. Summary of Key Points Recap of the importance of sound in postproduction. Brief summary of techniques and tools discussed. Looking Ahead Final thoughts on the evolving role of sound in filmmaking. Encouragement to explore and experiment

Blog

how to Preliminary script recording

Welcome to [shatulanimation.com] Hello and welcome to [shatulanimation.com] – a space where curiosity how to Preliminary script recording meets knowledge, and passion turns into a shared journey. Whether you stumbled upon this corner of the internet by chance or intentionally sought it out, I’m thrilled you’re here. This blog is a culmination of countless hours of contemplation, research, and a deep desire to connect with like-minded individuals who share a love for [main topic of your blog, e.g., technology, travel, self-improvement]. Why This Blog Exists In today’s fast-paced digital age, we are constantly bombarded with information. While this abundance of knowledge is a treasure trove, it can often feel overwhelming. [Your Blog Name] was born out of a desire to sift through the noise and offer valuable, meaningful content that not only informs but also inspires. My goal is to create a sanctuary where ideas can flourish, and where every article provides a sense of enrichment and growth. Who Am I? Before diving into the depths of the topics we’ll explore together, let me introduce myself. My name is [Your Name], and I am [a brief description about you – your profession, passions, and what drives you]. Over the years, I’ve accumulated experiences in [relevant fields or interests] that have shaped my perspective and fueled my desire to share what I’ve learned. how to Introduction to Character and Movement The Journey Ahead This blog is more than just a collection of posts; it’s a journey. A journey through [main topics you will cover – e.g., the ever-evolving world of technology, the uncharted territories of travel, the transformative power of self-improvement]. Each post is crafted with care, aimed at sparking curiosity, offering new insights, and encouraging thoughtful discussions. 1. The World of Technology In our technological section, we’ll delve into the latest trends, explore groundbreaking innovations, and discuss how technology is reshaping our world. From AI and machine learning to cybersecurity and the Internet of Things, we’ll cover a broad spectrum of topics that highlight the marvels of modern technology. 2. Adventures in Travel Travel is not just about visiting new places; it’s about experiencing different cultures, meeting new people, and gaining a broader understanding of the world. Our travel section will take you on adventures across the globe, offering tips, guides, and stories that inspire wanderlust and make your journeys more enriching. 3. The Path to Self-Improvement Personal growth is a lifelong journey. In this section, we’ll explore strategies for self-improvement, from building better habits and enhancing productivity to understanding mental health and fostering emotional well-being. Together, we’ll uncover ways to lead a more fulfilling and balanced life. Engaging with the Community One of the most rewarding aspects of blogging is the community that forms around shared interests. I encourage you to engage with the content, leave comments, share your thoughts, and participate in discussions. Your insights and experiences are invaluable, and together, we can create a vibrant, supportive community. Looking Forward As we embark on this journey together, I am committed to providing content that is not only informative but also thought-provoking and inspiring. I welcome your feedback, suggestions, and ideas for future topics. This blog is a collaborative effort, and your input is crucial in shaping its direction. The Animator as Interpreter: A Deep Dive into the World of Animation Introduction Welcome to “shatulanimation.com,” a blog dedicated to exploring the fascinating world of animation. In this space, we’ll dive deep into how animators serve as interpreters of stories, emotions, and ideas, bringing them to life through their craft. Whether you’re an aspiring animator, a seasoned professional, or simply a fan of the art form, this blog aims to provide insights, inspiration, and a deeper understanding of the intricate work that goes into animation. Why Focus on Animation? Animation is a unique and powerful medium that transcends cultural and language barriers. It has the ability to communicate complex ideas and evoke deep emotions in ways that live-action cannot always achieve. From the early days of hand-drawn cartoons to the sophisticated 3D animations of today, the field has evolved dramatically, continually pushing the boundaries of what is possible. This blog is here to celebrate that evolution and to delve into the techniques, history, and artistry that make animation so special. About the Author My name is [Your Name], and I have been passionate about animation for as long as I can remember. With a background in [your relevant background, such as animation, graphic design, film studies], I have spent years studying and practicing the art of animation. This blog is a way for me to share my knowledge, experiences, and enthusiasm with others who share a love for this dynamic and expressive art form. The Animator’s Role as Interpreter An animator’s job goes far beyond making characters move. At its core, animation is about storytelling and interpretation. Animators breathe life into characters, imbuing them with personality and emotion through movement. They take a script or storyboard and translate it into a visual experience that resonates with audiences. Storytelling Through Movement One of the key aspects of animation is its ability to tell a story through movement. Unlike static images, animated characters and scenes can convey a wide range of emotions and actions. This requires a deep understanding of human and animal behavior, as well as a keen eye for detail. Animators must interpret the intentions behind a character’s actions and express them convincingly. For example, consider the subtle differences in how a character might walk when they are happy versus when they are sad. A happy walk might be characterized by a light, bouncy step, while a sad walk might be slower and more dragging. These nuances are essential for creating believable and relatable characters. Emotional Resonance Emotion is at the heart of any compelling story, and animation is no exception. Animators are tasked with interpreting the emotional beats of a story and translating them into visual form. This involves understanding the emotional arc of a scene and ensuring

Blog

The Art and Science of Production Design

Introduction :- The Art and Science of Production Design Definition of Script Analysis Importance of Script Historical Perspective Overview of Key Elements Understanding the Script Reading for the First Time Identifying the Genre and Style Understanding the Plot Structure Analyzing Characters Recognizing Themes and Motifs Detailed Scene Analysis Breaking Down Scenes Analyzing Dialogue Identifying Subtext Scene Objectives and Obstacles Character Analysis Main Characters vs. Supporting Characters Character Arcs and Development Motivations and Objectives Relationships and Dynamics Technical Elements Stage Directions and Their Importance Visual and Auditory Cues Pacing and Timing Use of Language and Tone Contextual Analysis Historical and Cultural Context Author’s Background and Intentions Reception and Impact Practical Application How Directors Use Script Analysis Actor’s Perspective on Script Analysis Script Analysis for Writers and Editors Conclusion Summarizing Key Points The Future of Script Analysis Encouraging Further Study and Exploration Introduction Script analysis is a crucial tool in the toolkit of anyone involved in the creative arts, particularly in fields like screenwriting, theatre, and literary studies. At its core, script analysis involves the breakdown of a script to understand its deeper meanings, structures, and components. This analytical process is vital for directors, actors, writers, and scholars alike, offering a roadmap to explore the text’s subtleties and nuances. how to Introduction to Character and Movement The importance of script analysis cannot be overstated. For a director, it lays the groundwork for the entire production, influencing decisions on casting, set design, and pacing. Actors rely on script analysis to build their characters, understanding their motivations, and relationships. Writers and editors use it to refine their work, ensuring that every element serves the story’s overall vision. Scholars and students, on the other hand, dissect scripts to appreciate the craftsmanship and thematic concerns of the playwright or screenwriter. Historically, the practice of script analysis dates back to the earliest days of theatre. In ancient Greece, playwrights like Aeschylus, Sophocles, and Euripides meticulously crafted their scripts, knowing that every word and action had to serve the narrative and thematic goals. The tradition continued through the Renaissance with Shakespeare’s intricate plays, which have been studied and analyzed for centuries. In modern times, the complexity of film and television scripts has brought new dimensions to script analysis, incorporating elements of visual storytelling and multimedia. Key elements of script analysis include understanding the plot structure, character development, themes, motifs, and technical aspects like stage directions and dialogue. Each of these components plays a significant role in bringing a script to life, whether on stage, screen, or in academic discourse. Understanding a script begins with an initial read-through, where the reader familiarizes themselves with the basic storyline, characters, and setting. This first reading is crucial for getting an overall sense of the script’s tone and style. Subsequent readings delve deeper into the narrative structure, examining how the plot unfolds, the development of characters, and the interplay of themes. Identifying the genre and style of a script is another essential step. Whether it’s a comedy, tragedy, drama, or a hybrid genre, understanding the conventions and expectations of the genre helps in interpreting the script accurately. For instance, the comedic timing in a farce is vastly different from the measured pacing of a drama. Analyzing the plot structure involves breaking down the story into its fundamental components: the exposition, rising action, climax, falling action, and resolution. This breakdown helps in understanding the narrative arc and how each scene contributes to the overall story. Key plot points, twists, and turns are identified and examined for their significance and impact. Characters are the heart of any script. Analyzing characters involves looking at their motivations, objectives, and development throughout the script. Understanding what drives a character, their relationships with others, and how they change over the course of the story is crucial for bringing them to life. This analysis also includes examining the dialogue, which reveals much about a character’s personality, background, and inner thoughts. Themes and motifs are the underlying currents that give a script its depth and resonance. Identifying these elements involves looking beyond the surface action to uncover the script’s broader messages and ideas. Themes might include love, power, betrayal, or redemption, while motifs could be recurring symbols, phrases, or images that reinforce the themes. Technical elements like stage directions, visual and auditory cues, and the use of language and tone are also important aspects of script analysis. These elements provide practical instructions for production and contribute to the script’s overall aesthetic and emotional impact. Contextual analysis adds another layer of understanding. This involves looking at the historical and cultural context in which the script was written, the background and intentions of the author, and the reception and impact of the work. Understanding the context can shed light on why certain choices were made and how the script might have been perceived by its original audience. In practical terms, directors use script analysis to guide their vision for a production. By understanding the script’s nuances, they can make informed decisions about casting, set design, lighting, and pacing. Actors rely on script analysis to build authentic, compelling characters, delving into their backstories, motivations, and relationships. For writers and editors, script analysis is a tool for refining their work, ensuring that every element serves the story’s overall vision and purpose. Script analysis is not just an academic exercise; it’s a practical tool that brings scripts to life, transforming words on a page into dynamic, engaging performances. Whether you’re a director, actor, writer, or scholar, mastering the art of script analysis is essential for understanding and appreciating the craft of storytelling. Introduction Production design is one of the most crucial, yet often underappreciated, aspects of filmmaking. It involves the creation of the visual environment in which a story unfolds, encompassing everything from sets and locations to costumes, props, and the overall aesthetic. The role of a production designer is to bring the script to life by creating a world that feels authentic and enhances the narrative. At its core, production design is about

Blog

how to Introduction to Character and Movement

Introduction :-how to Introduction to Character and Movement What is a Kong? Importance of character and movement in games Overview of what the blog will cover Understanding the Basics Definition of character in gaming Definition of movement in gaming What is a Kong? Brief history and background Why Kongs are popular in game development Character Development Creating a character using Kong Customization and personalization Animation and sprites Movement Mechanics Basic movements (walk, run, jump) Advanced movements (climbing, swimming, flying) Physics and collision detection Implementing Character and Movement with Kong Step-by-step guide to creating a basic character Coding character movements Troubleshooting common issues Enhancing the Experience Adding sound effects and music Implementing environmental interactions Testing and refining character movements Conclusion Recap of key points Encouragement to experiment and innovate Additional resources for further learning Blog Post Draft Introduction to Character and Movement with a Kong Welcome to our in-depth guide on character and movement in game development, specifically focusing on using Kong. In this post, we will explore the fundamentals of character creation, movement mechanics, and how you can bring your characters to life using Kong. Whether you’re a beginner or looking to refine your skills, this guide will provide valuable insights and practical steps to enhance your game development journey. The Complete CSS Animations Tutorial [With Examples] Understanding the Basics Definition of Character in Gaming A character in gaming refers to any entity that a player can control or interact with within the game. Characters can range from human figures to animals, robots, or even abstract entities. The design and development of characters are crucial as they often serve as the primary connection between the player and the game world. Definition of Movement in Gaming Movement in gaming encompasses the various ways a character can navigate through the game environment. This includes basic actions like walking and running, as well as more complex behaviors such as climbing, swimming, or flying. Effective movement mechanics are essential for creating an engaging and immersive gameplay experience. What is a Kong? Kong is a versatile game development tool known for its user-friendly interface and robust features. Originally inspired by the iconic character Donkey Kong, Kong has become a popular choice among indie developers and hobbyists. It allows for the creation of diverse characters and intricate movement mechanics without requiring extensive coding knowledge. Brief History and Background The Kong development tool was created to simplify the process of game development, making it accessible to a broader audience. Over the years, it has evolved to include a wide range of features, allowing developers to create complex and interactive games. Why Kongs are Popular in Game Development Kong’s popularity stems from its ease of use, flexibility, and the vibrant community that supports it. Developers can quickly prototype and iterate on their ideas, making it an excellent choice for both beginners and experienced developers looking to experiment with new concepts. Character Development Creating a character in Kong involves several steps, from designing the character’s appearance to defining their behaviors and interactions within the game. Creating a Character Using Kong Start by designing your character’s appearance. Kong offers various tools for creating and customizing sprites, allowing you to bring your vision to life. Once the visual design is complete, you can define the character’s attributes, such as health, speed, and strength. Customization and Personalization One of the strengths of Kong is the ability to customize characters to suit your game’s unique style. You can create detailed animations for different actions, such as walking, jumping, and attacking, adding personality and depth to your characters. Animation and Sprites Kong supports sprite-based animation, making it easy to create fluid and realistic movements. By breaking down actions into individual frames, you can create smooth transitions and responsive controls, enhancing the overall player experience. Movement Mechanics Movement mechanics are a critical component of game design, directly impacting how players interact with the game world. Basic Movements (Walk, Run, Jump) In Kong, implementing basic movements is straightforward. You can define the character’s movement speed, jump height, and other parameters through a simple interface. Kong’s physics engine handles the rest, ensuring realistic and consistent movement. Advanced Movements (Climbing, Swimming, Flying) For more complex movements, Kong offers a range of options. Whether your character needs to climb walls, swim through water, or fly through the air, Kong provides the tools to implement these behaviors. You can also create custom movement patterns to match your game’s unique requirements. Physics and Collision Detection Kong’s built-in physics engine ensures that movements feel natural and realistic. Collision detection is handled automatically, allowing your characters to interact with the environment and other objects seamlessly. This includes detecting when characters land on platforms, bump into obstacles, or interact with other entities. Implementing Character and Movement with Kong Now that we’ve covered the basics, let’s dive into the practical aspects of creating and animating a character using Kong. Step-by-Step Guide to Creating a Basic Character Design the Character Sprite: Use Kong’s sprite editor to create your character’s visual representation. Define Character Attributes: Set the character’s health, speed, and other attributes in the properties panel. Animate the Character: Create animations for different actions, such as walking, jumping, and attacking. Implement Movement Controls: Use Kong’s scripting tools to define how the character moves in response to player input. Test and Iterate: Continuously test your character’s movements and make adjustments as needed to ensure a smooth and enjoyable experience. Coding Character Movements Kong’s scripting language is designed to be easy to learn and use. You can create complex movement patterns with just a few lines of code. For example, to make a character jump, you might write a script that applies an upward force when the player presses the jump button. if (input.isKeyPressed(“space”)) { character.applyForce(“up”, jumpStrength); } This simple script checks if the spacebar is pressed and then applies an upward force to the character, causing them to jump. Troubleshooting Common Issues Even with the best planning, you may encounter issues when implementing character movements. Common

Blog

The Complete CSS Animations Tutorial [With Examples]

Introduction CSS animations have become an integral part of modern web The Complete CSS Animations Tutorial [With Examples] development, adding dynamic and engaging interactions to web pages. Whether you’re creating subtle transitions or complex animations, CSS provides a powerful toolset to bring your designs to life. In this comprehensive tutorial, we’ll dive deep into CSS animations, exploring fundamental concepts, advanced techniques, and practical examples to help you master this essential skill. Introduction to CSS Animations CSS animations allow you to animate HTML elements without using JavaScript or Flash. They provide a way to smoothly transition between different states of an element, such as changing its color, size, position, or other properties. CSS animations consist of two main parts: keyframes and animation properties. Keyframes Keyframes define the start and end points of an animation, as well as any intermediate points. You can specify multiple keyframes using the @keyframes rule, which defines the styles for the element at various points during the animation. @keyframes example { 0% { background-color: red; } 50% { background-color: yellow; } 100% { background-color: green; } } how to Started with Animation: A Comprehensive Guide Animation Properties The animation properties control the behavior of the animation, such as its duration, timing, and iteration count. The most commonly used animation properties include: animation-name: Specifies the name of the keyframes animation. animation-duration: Defines how long the animation takes to complete one cycle. animation-timing-function: Describes the speed curve of the animation. animation-delay: Delays the start of the animation. animation-iteration-count: Specifies the number of times the animation should play. animation-direction: Determines whether the animation should play in reverse on alternate cycles. div { animation-name: example; animation-duration: 4s; animation-timing-function: ease-in-out; animation-delay: 2s; animation-iteration-count: infinite; animation-direction: alternate; } Basic CSS Animation Example Let’s start with a simple example to illustrate the basic concepts of CSS animations. We’ll animate a square element, changing its background color and position <!DOCTYPE html> <html lang=”en”> <head> <meta charset=”UTF-8″> <meta name=”viewport” content=”width=device-width, initial-scale=1.0″> <title>Basic CSS Animation</title> <style> @keyframes moveAndChangeColor { 0% { background-color: red; left: 0; } 50% { background-color: yellow; left: 50%; } 100% { background-color: green; left: 100%; } } .square { width: 100px; height: 100px; position: absolute; animation-name: moveAndChangeColor; animation-duration: 5s; animation-timing-function: ease-in-out; animation-iteration-count: infinite; animation-direction: alternate; } </style> </head> <body> <div class=”square”></div> </body> </html> In this example, the .square element moves horizontally across the screen while changing its background color. The animation repeats infinitely and alternates direction on each iteration. Advanced CSS Animation Techniques Once you’re comfortable with the basics, you can start exploring more advanced techniques to create complex and captivating animations. Chaining Animations You can chain multiple animations together by specifying multiple @keyframes rules and animation properties for a single element. This allows you to create more intricate animations. @keyframes scale { 0% { transform: scale(1); } 50% { transform: scale(1.5); } 100% { transform: scale(1); } } @keyframes rotate { 0% { transform: rotate(0deg); } 50% { transform: rotate(180deg); } 100% { transform: rotate(360deg); } } .element { animation: scale 2s infinite, rotate 4s infinite; } Using CSS Variables CSS variables can add flexibility to your animations, allowing you to change values dynamically. :root { –scale-factor: 1.5; –rotation-degrees: 180deg; } @keyframes scale { 0% { transform: scale(1); } 50% { transform: scale(var(–scale-factor)); } 100% { transform: scale(1); } } @keyframes rotate { 0% { transform: rotate(0deg); } 50% { transform: rotate(var(–rotation-degrees)); } 100% { transform: rotate(360deg); } } .element { animation: scale 2s infinite, rotate 4s infinite; } Animation Fill Modes The animation-fill-mode property specifies how a CSS animation should apply styles to its target before and after its execution. This property can have four values: none: The default value. The animation does not apply any styles outside its execution period. forwards: After the animation ends, the element retains the final keyframe styles. backwards: Before the animation starts, the element uses the styles of the initial keyframe. both: Applies both forwards and backwards rules. .element { animation: example 3s forwards; } .element { animation: example 3s forwards; } Pausing and Playing Animations The animation-play-state property allows you to pause and play animations. .element { animation: example 3s infinite; } .element:hover { animation-play-state: paused; } Practical CSS Animation Examples To better understand how to implement CSS animations, let’s look at a few practical examples. Bouncing Ball A bouncing ball animation can add a playful touch to your website. @keyframes bounce { 0%, 20%, 50%, 80%, 100% { transform: translateY(0); } 40% { transform: translateY(-150px); } 60% { transform: translateY(-75px); } } .ball { width: 50px; height: 50px; background-color: blue; border-radius: 50%; animation: bounce 2s infinite; } Loading Spinner A loading spinner is a common UI element that can enhance the user experience. @keyframes spin { 0% { transform: rotate(0deg); } 100% { transform: rotate(360deg); } } .spinner { width: 50px; height: 50px; border: 5px solid lightgray; border-top: 5px solid blue; border-radius: 50%; animation: spin 1s linear infinite; } Fading In and Out Fading animations are great for creating smooth transitions between different states. @keyframes fadeIn { from { opacity: 0; } to { opacity: 1; } } @keyframes fadeOut { from { opacity: 1; } to { opacity: 0; } } .element { animation: fadeIn 2s ease-in; } .element.hidden { animation: fadeOut 2s ease-out; } Best Practices for CSS Animations To ensure your CSS animations are effective and performant, consider the following best practices: Keep Animations Simple Complex animations can be overwhelming and may negatively impact performance. Stick to simple and subtle animations that enhance the user experience without being distracting. Optimize Performance CSS animations can impact performance, especially on mobile devices. Use the will-change property to optimize the performance of your animations. .element { will-change: transform, opacity; } test Across Devices Ensure your animations work seamlessly across different devices and browsers. Test your animations on a variety of screen sizes and resolutions to ensure a consistent experience. Use Prefixed Properties Some older browsers may require vendor prefixes for certain CSS properties. Use prefixed properties to ensure broader compatibility. .element {

Blog

how to Started with Animation: A Comprehensive Guide

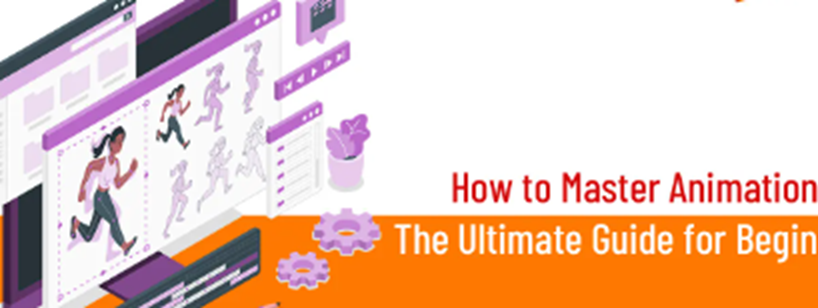
Introduction Animation is a captivating blend of art and technology that brings stories and how to Started with Animation: A Comprehensive Guide characters to life. Whether you’re an aspiring animator, a hobbyist looking to expand your creative horizons, or a professional artist seeking to diversify your skills, getting started with animation can be both exciting and overwhelming. This comprehensive guide aims to provide you with everything you need to begin your journey into the world of animation, from understanding basic concepts and tools to exploring different styles and techniques. Creating a 2D Cartoon: A Comprehensive Guide Introduction The Magic of Animation Animation has a unique power to transcend reality and capture the imagination of audiences of all ages. From the charming simplicity of early Disney cartoons to the stunning visual effects in modern movies and video games, animation has continuously evolved, becoming an integral part of storytelling in various media. The magic of animation lies in its ability to create worlds, characters, and scenarios that are otherwise impossible in real life. Why Learn Animation? Learning animation can open up a world of opportunities. Here are a few reasons why you might want to delve into this fascinating field: Creative Expression: Animation allows you to bring your ideas to life in a visually engaging way. Career Opportunities: The animation industry is booming, with demand for skilled animators in film, television, advertising, and video games. Technical Skills: Animation teaches valuable technical skills, including digital art, motion graphics, and software proficiency. Versatility: The principles of animation can be applied across various mediums, from 2D and 3D animation to stop-motion and motion graphics. The Journey Ahead This guide is designed to take you from a novice to a confident beginner in animation. We will cover the following topics: Understanding Animation Basics: Key principles and foundational concepts. Tools and Software: Overview of essential tools and software for animators. Choosing Your Animation Style: Exploration of different animation styles and techniques. Creating Your First Animation: Step-by-step guide to creating a simple animation project. Building a Portfolio: Tips for showcasing your work and finding your niche. Resources and Next Steps: Further learning resources and advice for advancing your skills. Understanding Animation Basics Key Principles of Animation The foundation of animation lies in understanding its core principles. These principles were first introduced by Disney animators Frank Thomas and Ollie Johnston in their book The Illusion of Life: Disney Animation. Here are some of the key principles: Squash and Stretch: This principle gives the illusion of weight and volume to characters as they move. It’s the most important principle and applies to simple objects, like a bouncing ball, or more complex constructions, like a character’s face. Anticipation: This prepares the audience for a major action the character is about to perform. For example, a character will crouch before jumping. Staging: This principle is akin to composition in a painting. It directs the audience’s attention to the most important part of the scene. Straight Ahead Action and Pose to Pose: These are two different approaches to creating movement. Straight ahead action means drawing each frame sequentially from start to finish. Pose to pose involves drawing the key frames first and then filling in the intervals. Follow Through and Overlapping Action: These principles help in making the movement more realistic by showing that parts of a character continue to move after the character has stopped, and that different parts of a character move at different rates. Ease In and Ease Out: This principle refers to the way objects come to Tools and Resources: A Comprehensive Guide for Aspiring Animators Embarking on a journey into the world of animation can be an exhilarating experience, filled with creativity, technical challenges, and endless opportunities for storytelling. Whether you’re a budding animator, a seasoned artist looking to expand your skill set, or simply someone passionate about bringing characters to life, having the right tools and resources is crucial. In this comprehensive guide, we’ll explore the essential tools and resources you need to succeed in animation, covering everything from hardware and software to educational platforms and community networks. Introduction The Importance of the Right Tools and Resources Animation is a multifaceted discipline that requires a blend of artistic talent and technical prowess. The right tools can streamline your workflow, enhance your creativity, and improve the quality of your work. Meanwhile, access to the right resources can provide you with the knowledge, inspiration, and support necessary to grow as an animator. Goals of This Guide This guide aims to provide you with a detailed overview of the tools and resources available to animators. By the end of this guide, you’ll have a comprehensive understanding of: Essential Hardware: Computers, graphics tablets, and other equipment necessary for animation. Animation Software: An overview of the best software for 2D, 3D, and stop-motion animation. Educational Resources: Online courses, books, and tutorials to help you learn and master animation techniques. Community and Networking: Forums, social media groups, and professional organizations where you can connect with other animators. Additional Resources: Libraries, asset stores, and other tools that can aid in your animation projects. Essential Hardware Computers The backbone of any animation setup is a powerful computer. The requirements for an animation workstation can vary depending on the type of animation you plan to create, but here are some general guidelines: Processor (CPU): A multi-core processor with high clock speed is essential for rendering animations and running complex software. Graphics Card (GPU): A dedicated graphics card is crucial for 3D animation and rendering. NVIDIA and AMD are popular choices. Memory (RAM): At least 16GB of RAM is recommended for smooth multitasking and handling large animation files. Storage: A combination of SSD (for speed) and HDD (for storage capacity) is ideal. Aim for at least 500GB SSD and 1TB HDD. Monitor: A high-resolution monitor with accurate color representation is important for detailed work. Graphics Tablets A graphics tablet is an indispensable tool for digital animators, offering precision and control that a mouse cannot match. Here

Blog

Creating a 2D Cartoon: A Comprehensive Guide

Introduction Cartoon creation has evolved significantly over the years, Creating a 2D Cartoon: A Comprehensive Guide but the essence of storytelling through animated characters remains timeless. Whether you’re an aspiring animator or a hobbyist, creating a 2D cartoon involves a blend of creativity, technical skills, and patience. This guide will walk you through the entire process, from conceptualization to the final render, using Python and some popular libraries like Pygame and OpenCV. By the end, you’ll have a solid foundation to start your own 2D cartoon project. The Evolution of 2D Cartoons 2D cartoons have a rich history, dating back to the early 20th century with classics like “Steamboat Willie” by Walt Disney. These cartoons were traditionally hand-drawn frame by frame, which was labor-intensive but produced timeless pieces of art. The advent of computers revolutionized this process, making it more accessible and efficient. Today, anyone with a computer and the right tools can create their own 2D animations. Blender 3D: A Powerful and Versatile Introduction Why 2D Cartoons? 2D cartoons hold a unique charm that 3D animations sometimes lack. The simplicity and stylized nature of 2D art allow for more exaggerated expressions and movements, which are often more engaging and entertaining. Additionally, 2D animation requires fewer resources than 3D, making it an excellent starting point for beginners. Tools and Libraries For this guide, we’ll focus on using Python, Pygame, and OpenCV. Python is a versatile programming language that’s easy to learn and widely used in various fields, including animation. Pygame is a set of Python modules designed for writing video games but is also perfect for creating 2D animations. OpenCV, primarily known for computer vision, can be handy for image processing tasks. tep-by-Step Guide to Creating a 2D Cartoon Step 1: Conceptualization Before diving into coding, you need a clear concept. This includes the story, characters, and setting. Here are some tips: Storyboarding: Create a storyboard to outline the main scenes and actions. This helps visualize the flow and identify key frames. Character Design: Sketch your characters, focusing on their appearance, expressions, and key poses. Tools like Adobe Illustrator or even paper and pencil work well for this stage. Backgrounds and Props: Design the backgrounds and any objects your characters will interact with. Step 2: Setting Up the Environment First, ensure you have Python installed on your computer. You can download it from Python’s official website. Once installed, use pip to install Pygame and OpenCV: pip install pygame opencv-python Step 3: Creating the Basic Framework We’ll start by setting up a basic Pygame window. This will be our canvas for drawing and animating. import pygame import sys # Initialize Pygame pygame.init() # Constants SCREEN_WIDTH = 800 SCREEN_HEIGHT = 600 FPS = 30 # Set up the display screen = pygame.display.set_mode((SCREEN_WIDTH, SCREEN_HEIGHT)) pygame.display.set_caption(“2D Cartoon”) # Main loop clock = pygame.time.Clock() running = True while running: for event in pygame.event.get(): if event.type == pygame.QUIT: running = False screen.fill((255, 255, 255)) # Fill the screen with white color # Update the display pygame.display.flip() clock.tick(FPS) pygame.quit() sys.exit() This code initializes Pygame, sets up a window, and enters a main loop that keeps the window open until the user closes it. Step 4: Drawing Characters and Backgrounds Next, we’ll draw our characters and backgrounds. For simplicity, let’s create a simple character and a static background. # Character class class Character: def __init__(self, x, y, width, height, color): self.rect = pygame.Rect(x, y, width, height) self.color = color def draw(self, surface): pygame.draw.rect(surface, self.color, self.rect) # Initialize character character = Character(100, 100, 50, 50, (0, 0, 255)) # Background color background_color = (135, 206, 250) # Sky blue # Main loop while running: for event in pygame.event.get(): if event.type == pygame.QUIT: running = False screen.fill(background_color) # Fill the screen with background color # Draw character character.draw(screen) # Update the display pygame.display.flip() clock.tick(FPS) pygame.quit() sys.exit() In this example, we create a simple Character class that can draw a blue rectangle on the screen. This rectangle represents our character. Step 5: Adding Animation Animation in 2D cartoons is achieved by changing the character’s position or appearance over time. Let’s animate our character to move across the screen. # Animation parameters character_speed = 5 # Main loop while running: for event in pygame.event.get(): if event.type == pygame.QUIT: running = False screen.fill(background_color) # Move character character.rect.x += character_speed if character.rect.x > SCREEN_WIDTH: character.rect.x = -character.rect.width # Draw character character.draw(screen) # Update the display pygame.display.flip() clock.tick(FPS) pygame.quit() sys.exit() This code moves the character from left to right. When it reaches the end of the screen, it reappears on the left side, creating a looping animation. Step 6: Adding Interactivity Interactivity makes cartoons more engaging. Let’s add keyboard controls to move the character. # Main loop while running: for event in pygame.event.get(): if event.type == pygame.QUIT: running = False keys = pygame.key.get_pressed() if keys[pygame.K_LEFT]: character.rect.x -= character_speed if keys[pygame.K_RIGHT]: character.rect.x += character_speed if keys[pygame.K_UP]: character.rect.y -= character_speed if keys[pygame.K_DOWN]: character.rect.y += character_speed screen.fill(background_color) # Draw character character.draw(screen) # Update the display pygame.display.flip() clock.tick(FPS) pygame.quit() sys.exit() Now, you can move the character using the arrow keys. Step 7: Adding More Characters and Objects To make the cartoon more interesting, add more characters and objects. You can create multiple instances of the Character class and animate them independently. # Initialize more characters character2 = Character(200, 200, 50, 50, (255, 0, 0)) # Red character character3 = Character(300, 300, 50, 50, (0, 255, 0)) # Green character # Main loop while running: for event in pygame.event.get(): if event.type == pygame.QUIT: running = False keys = pygame.key.get_pressed() if keys[pygame.K_LEFT]: character.rect.x -= character_speed if keys[pygame.K_RIGHT]: character.rect.x += character_speed if keys[pygame.K_UP]: character.rect.y -= character_speed if keys[pygame.K_DOWN]: character.rect.y += character_speed screen.fill(background_color) # Draw characters character.draw(screen) character2.draw(screen) character3.draw(screen) # Update the display pygame.display.flip() clock.tick(FPS) pygame.quit() sys.exit() In this example, we added two more characters, each with a different color. Step 8: Implementing Advanced Animations Advanced animations often involve changing the character’s appearance, such as walking cycles or facial expressions. This requires using sprite sheets or separate images for each frame. #

Blog

Blender 3D: A Powerful and Versatile Introduction

Introduction to Blender 3D Blender 3D stands as one of the most robust and Blender 3D: A Powerful and Versatile Introduction versatile tools in the realm of 3D creation and animation. Whether you are a novice exploring the world of computer graphics or a seasoned professional in the field, Blender offers a comprehensive suite of features that cater to a wide range of creative endeavors. From modeling and texturing to animation and rendering, Blender’s capabilities are as expansive as they are impressive.   Getting Started with Blender 3D 1. Installation and Setup Getting Blender up and running on your system is the first step. It’s freely available for download on its official website, compatible with Windows, macOS, and Linux. Once installed, familiarize yourself with the interface which includes customizable layouts and a wide array of tools conveniently accessible via hotkeys and menus. Introduction to 3D Animation with Python 2. Navigating the Interface Blender’s interface may seem daunting at first glance, but understanding its layout is crucial for efficient workflow. The main areas include the 3D viewport for manipulating objects, the timeline for animation control, and the properties panel for adjusting object attributes. Customization options allow users to tailor the workspace to suit their specific needs. 3. Modeling and Sculpting Blender offers powerful modeling tools that facilitate the creation of intricate 3D models. From basic primitives to detailed sculptures, the software supports various techniques including polygonal modeling, subdivision surfaces, and sculpting. Artists can utilize modifiers to non-destructively edit their models and achieve complex shapes with ease. 4. Texturing and Materials Applying textures and materials brings realism and aesthetic appeal to 3D scenes. Blender supports procedural textures as well as image-based textures, allowing for intricate surface details. The node-based shader editor provides flexibility in creating and fine-tuning materials, enabling artists to achieve realistic reflections, transparency, and lighting effects. 5. Animation and Rigging Animating objects and characters is another forte of Blender. The software offers a robust armature system for rigging models, making them poseable and ready for animation. Keyframe animation, along with advanced techniques such as inverse kinematics (IK) and shape keys, empowers artists to breathe life into their creations and convey narratives through motion. 6. Rendering and Output Rendering transforms 3D scenes into visually stunning images or animations. Blender’s powerful Cycles renderer employs path tracing to produce realistic lighting and shadows, while the Eevee real-time engine offers quick previews and animations. Output options include image sequences, videos, and interactive applications suitable for various platforms. Advanced Features and Community Support 1. Simulation and Dynamics Blender includes simulation tools for creating realistic physics-based effects such as fluid simulations, smoke and fire, cloth dynamics, and particle systems. These features enhance the authenticity and dynamism of animated scenes, making Blender a preferred choice for both hobbyists and professionals alike. 2. Scripting and Add-ons For users seeking enhanced functionality, Blender supports Python scripting and a vast array of community-developed add-ons. Custom scripts automate repetitive tasks and extend Blender’s capabilities, while add-ons provide specialized tools for specific workflows ranging from architectural visualization to character animation. 3. Community and Resources Blender boasts a vibrant and supportive community comprising artists, developers, and enthusiasts. Online forums, tutorials, and workshops abound, offering guidance, inspiration, and troubleshooting tips. The open-source nature of Blender fosters collaboration and innovation, continually pushing the boundaries of what’s possible in 3D creation. 1. Installation and Setup Getting Blender up and running on your system is the first step. It’s freely available for download on its official website, compatible with Windows, macOS, and Linux. Once installed, familiarize yourself with the interface which includes customizable layouts and a wide array of tools conveniently accessible via hotkeys and menus. # Example code snippet for installing Blender via Python script import urllib.request import zipfile import os blender_download_url = “https://download.blender.org/release/Blender2.93/blender-2.93.0-linux-x64.tar.xz” download_path = “/path/to/download/location” def download_and_extract_blender(url, download_path): # Download Blender urllib.request.urlretrieve(url, download_path + “/blender.tar.xz”) # Extract Blender with zipfile.ZipFile(download_path + “/blender.tar.xz”, ‘r’) as zip_ref: zip_ref.extractall(download_path) # Clean up downloaded file os.remove(download_path + “/blender.tar.xz”) download_and_extract_blender(blender_download_url, download_path) 2. Navigating the Interface Blender’s interface may seem daunting at first glance, but understanding its layout is crucial for efficient workflow. The main areas include the 3D viewport for manipulating objects, the timeline for animation control, and the properties panel for adjusting object attributes. Customization options allow users to tailor the workspace to suit their specific needs. 3. Modeling and Sculpting Blender offers powerful modeling tools that facilitate the creation of intricate 3D models. From basic primitives to detailed sculptures, the software supports various techniques including polygonal modeling, subdivision surfaces, and sculpting. Artists can utilize modifiers to non-destructively edit their models and achieve complex shapes with ease. # Example code snippet for creating a basic 3D model in Blender using Python API import bpy # Clear existing scene bpy.ops.wm.read_factory_settings(use_empty=True) # Create a cube bpy.ops.mesh.primitive_cube_add(size=2) # Select the cube bpy.context.object.select_set(True) # Apply a subdivision surface modifier bpy.ops.object.modifier_add(type=’SUBSURF’) 4. Texturing and Materials Applying textures and materials brings realism and aesthetic appeal to 3D scenes. Blender supports procedural textures as well as image-based textures, allowing for intricate surface details. The node-based shader editor provides flexibility in creating and fine-tuning materials, enabling artists to achieve realistic reflections, transparency, and lighting effects. 5. Animation and Rigging Animating objects and characters is another forte of Blender. The software offers a robust armature system for rigging models, making them poseable and ready for animation. Keyframe animation, along with advanced techniques such as inverse kinematics (IK) and shape keys, empowers artists to breathe life into their creations and convey narratives through motion. # Example code snippet for creating a simple animation in Blender using Python API import bpy # Select default cube bpy.ops.object.select_all(action=’DESELECT’) bpy.data.objects[‘Cube’].select_set(True) bpy.context.view_layer.objects.active = bpy.data.objects[‘Cube’] # Animate cube rotation bpy.ops.object.mode_set(mode=’POSE’) bpy.context.object.pose.bones[‘Bone’].rotation_euler = (0, 0, 0) bpy.ops.anim.keyframe_insert_menu(type=’Rotation’) bpy.context.object.pose.bones[‘Bone’].rotation_euler = (0, 0, 2 * 3.14159) bpy.ops.anim.keyframe_insert_menu(type=’Rotation’) 6. Rendering and Output Rendering transforms 3D scenes into visually stunning images or animations. Blender’s powerful Cycles renderer employs path tracing to produce realistic lighting and shadows, while the Eevee real-time engine offers quick previews and animations. Output options

Scroll to Top