Blog

Mastering Timing and Spacing

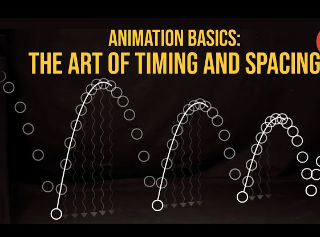
Introduction:- Mastering Timing and Spacing   In animation, timing and spacing are crucial principles that dictate the motion and behavior of objects and characters. Understanding these concepts will allow you to create more believable and engaging animations. This lesson will cover the basics of timing and spacing, how they influence animation, and practical tips for applying them in your work.   1. Understanding Timing in Animation Timing refers to the number of frames or the amount of time an action takes to complete. It directly influences the perception of an object’s weight, speed, and personality. Slow Timing: Actions taking more frames are slower and can suggest weight, laziness, or carefulness. For example, a heavy object lifting slowly indicates its mass. Fast Timing: Actions taking fewer frames are quicker and can suggest lightness, speed, or urgency. A character running quickly with fewer frames appears energetic and hurried. Exercise: Create two animations of a bouncing ball. In the first, use slow timing to make the ball appear heavy. In the second, use fast timing to make it appear light. 2. Exploring Spacing in Animation Spacing refers to the distance an object travels between frames. It controls the smoothness and speed of motion. Even Spacing: Equal distances between frames create a consistent, smooth motion. It is often used for mechanical movements. Uneven Spacing: Varying distances between frames create acceleration and deceleration, adding more natural and dynamic motion. Exercise: Animate a pendulum swing. Start with even spacing and then experiment with uneven spacing to create more realistic motion.   Introduction to 2D Animation: Lesson 1 3. Combining Timing and Spacing The interplay between timing and spacing defines the overall feel of the animation. Ease In and Ease Out: Gradually changing the spacing creates a smooth start and stop, making movements more realistic. Anticipation and Follow-Through: Adjusting timing and spacing before and after an action adds fluidity and believability. Exercise: Animate a character jumping. Focus on the anticipation (crouching before the jump), the action (the jump itself), and the follow-through (landing). 4. Practical Tips for Animators Reference Real Life: Observe how people and objects move in real life to understand natural timing and spacing. Thumbnail Sketches: Create quick sketches to plan your animation and experiment with different timings and spacings before animating. Playback and Review: Frequently play back your animation to check if the timing and spacing feel right. Make adjustments as needed. Understanding Timing in Animation 1. The Basics of Timing Frames per Second (FPS): The standard frame rate for most animations is 24 frames per second. This means that 24 individual images are shown per second to create the illusion of movement. Keyframes and In-betweens: Keyframes mark the start and end of any movement, and in-between frames fill the motion between keyframes to create a smooth transition. 2. Principles of Timing in Animation Slow In and Slow Out: Actions start slowly, speed up, and then slow down at the end. This principle gives animations a more natural and realistic feel. Arcs: Most actions follow a natural arc. Arcs add realism to animation, as almost all natural movements follow curved paths rather than straight lines. Exaggeration: Exaggerating the timing of movements can make animations more dynamic and expressive. Over-exaggerating the timing can emphasize the weight and emotion behind the action. Staging: Good staging directs the audience’s attention to the most important parts of the scene, helping to tell the story more effectively. 3. Timing for Different Types of Animation Realistic Animation: Timing should closely mimic real-life physics. For example, a bouncing ball should adhere to principles of gravity and inertia. Cartoon Animation: Timing can be exaggerated to enhance humor and style. Characters can move faster or slower than real life for comedic effect. 3D Animation: Timing in 3D animation also considers real-world physics, but it can be adjusted to achieve more stylized movements. 4. Techniques for Improving Timing Reference Footage: Studying real-life footage helps animators understand natural timing. This is especially useful for realistic animations. Thumbnails and Animatics: Creating rough sketches or low-resolution animations (animatics) helps plan out timing before committing to detailed animation. Timing Charts: These are tools used to map out the spacing and timing of keyframes and in-betweens. They help visualize the timing of actions. 5. Tools and Software 2D Animation Software: Programs like Adobe Animate and Toon Boom Harmony offer tools for fine-tuning timing in traditional and digital 2D animation. 3D Animation Software: Software such as Blender, Maya, and 3ds Max provide detailed timing control for keyframes and motion paths. 6. Practical Application Bouncing Ball Exercise: One of the fundamental exercises for understanding timing. Varying the number of frames between bounces can simulate different weights and materials (e.g., a heavy ball vs. a light ball). Walk Cycles: Timing the steps in a walk cycle correctly is essential for making a character’s movement appear natural. Exploring Spacing in Animation Introduction In the realm of animation, spacing plays a crucial role in bringing characters and scenes to life. It is a fundamental principle that animators must understand and master to create believable and engaging motion. Spacing, often intertwined with timing, refers to the distance between individual frames or drawings. Proper spacing can convey a range of emotions and actions, from the brisk movement of a chase scene to the delicate flutter of a butterfly’s wings. This article delves into the importance of spacing in animation, exploring its impact on the storytelling and overall visual appeal. Understanding Spacing Spacing in animation determines how fast or slow an object moves. By varying the spacing, animators can manipulate the perceived speed and smoothness of motion. When frames are closely spaced, the action appears slow and smooth. Conversely, when frames are further apart, the action appears fast and abrupt. This principle can be observed in the classic bouncing ball animation, where the ball’s spacing changes as it ascends and descends, simulating acceleration and deceleration due to gravity. The Role of Timing and Spacing Timing and spacing are often mentioned together because they are intrinsically linked.

Blog

Introduction to 2D Animation: Lesson 1

Introduction:- Introduction to 2D Animation: Lesson 1 2D animation, with its rich history and timeless appeal, continues to captivate audiences worldwide. Whether it’s the nostalgic charm of classic cartoons or the modern vibrancy of digital animations, the principles and techniques of 2D animation remain foundational to the art of bringing drawings to life. In this blog post, we’ll delve into the basics of 2D animation, offering a comprehensive introduction to its key concepts, tools, and techniques. This lesson is designed for beginners who are eager to start their journey into the world of animation. The History of 2D Animation To truly appreciate the art of 2D animation, it’s essential to understand its origins and evolution. The journey of 2D animation began in the early 1900s with pioneers like Winsor McCay, who created mesmerizing short films like “Gertie the Dinosaur.” This era marked the beginning of a new form of storytelling, where artists could create the illusion of movement by drawing frame by frame. As technology advanced, so did animation techniques. The introduction of the cel animation process in the 1920s revolutionized the industry. This method involved drawing characters on transparent celluloid sheets, allowing for more efficient and detailed animations. Studios like Disney quickly adopted this technique, leading to the creation of iconic films such as “Snow White and the Seven Dwarfs” and “Pinocchio.” The digital age brought another significant shift in the 1990s. Traditional hand-drawn animation started to be complemented, and sometimes replaced, by computer-generated imagery (CGI). However, the fundamental principles of 2D animation remained the same, with artists using software to simulate traditional techniques. Creating Animated Educational A Step-by-Step Guide Basic Principles of 2D Animation At the heart of 2D animation are several fundamental principles that guide animators in creating realistic and engaging animations. These principles, often referred to as the “12 Principles of Animation,” were developed by Disney animators Ollie Johnston and Frank Thomas in the 1930s. Here are a few key principles: Squash and Stretch: This principle gives a sense of weight and flexibility to drawn objects. It is essential for creating the illusion of physical properties, making characters and objects appear more lifelike. Anticipation: To make actions more realistic and engaging, animators use anticipation. This involves preparing the audience for a major action, such as a character jumping or throwing an object. Staging: Staging involves the presentation of an idea so that it is clear to the audience. This includes the use of camera angles, character positioning, and background elements to direct the viewer’s attention. Straight Ahead Action and Pose to Pose: These are two different approaches to creating animation. Straight ahead action involves drawing frame by frame from start to finish, while pose to pose involves drawing key poses and then filling in the in-between frames. Follow Through and Overlapping Action: These principles help create more realistic movement by ensuring that different parts of a character or object continue to move after the main action has stopped. Slow In and Slow Out: To make movements more natural, animators use more frames at the beginning and end of an action, and fewer frames in the middle. This creates a sense of acceleration and deceleration. Arcs: Most natural movements follow an arc or circular path. Animators use this principle to make motions appear more fluid and realistic. Secondary Action: Adding secondary actions, such as a character’s facial expressions or the movement of hair, can support the main action and add more depth to the animation. Tools and Software for 2D Animation With advancements in technology, animators now have access to a variety of tools and software that make the animation process more efficient and versatile. Here are some popular tools used in 2D animation: Adobe Animate (formerly Flash): A powerful tool for creating vector-based animations. It is widely used for web animations, cartoons, and interactive projects. Toon Boom Harmony: A professional-grade software used by major studios. It offers a wide range of features for both traditional and digital animation, including rigging, compositing, and special effects. TVPaint Animation: This software is known for its robust set of tools for hand-drawn animation. It is especially popular among traditional animators transitioning to digital workflows. Clip Studio Paint: Originally designed for digital illustration, this software has become a favorite among animators for its intuitive interface and powerful drawing tools. OpenToonz: An open-source animation software that offers a range of features for both novice and professional animators. It is based on the software used by Studio Ghibli. Creating Your First 2D Animation Now that we’ve covered the basics, let’s dive into creating your first 2D animation. Follow these steps to get started: Concept and Storyboarding: Begin with a clear concept of what you want to animate. Create a storyboard to plan out the sequence of events. This will serve as a visual script for your animation. Character Design: Design your characters, keeping in mind the principles of squash and stretch to make them more dynamic. Create model sheets that show your characters from different angles. Background Design: Design the backgrounds and environments where your characters will interact. Make sure the backgrounds complement the style and tone of your animation. Key Poses and Inbetweens: Start by drawing the key poses of your characters. These are the main positions that define the movement. Once the key poses are in place, create the in-between frames to smooth out the motion. Timing and Spacing: Pay attention to the timing and spacing of your frames to ensure smooth and realistic movement. Use the principles of slow in and slow out to create natural acceleration and deceleration. Clean-Up and Coloring: Once the rough animation is complete, clean up the lines and add details. After that, proceed to color your characters and backgrounds. Final Touches and Exporting: Add any final touches, such as shadows, highlights, and special effects. Once everything is complete, export your animation in the desired format. Practice and Perseverance Creating a successful 2D animation requires patience and practice. As a beginner, it’s important to start

Blog

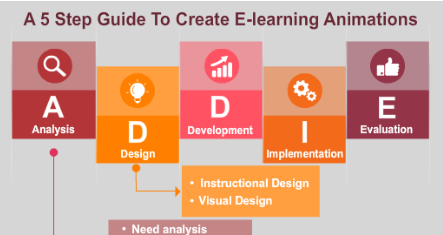
Creating Animated Educational A Step-by-Step Guide

Introduction In today’s digital age, animated educational videos have become  Creating Animated Educational A Step-by-Step Guide a popular tool for learning and teaching. They combine visual storytelling with educational content, making complex concepts easier to understand and more engaging. Whether you are a teacher, a content creator, or someone passionate about sharing knowledge, creating animated educational videos can significantly impact your audience. This guide will walk you through the process of creating these videos, from planning and scripting to animation and final touches, ensuring a smooth and straightforward approach for beginners and professionals alike.   Step 1: Planning Your Video Identify Your Objective Define the goal of your video. What do you want your audience to learn or understand? Determine the key takeaways you want to deliver. Know Your Audience Understand who your audience is. Are they students, professionals, or a general audience? Tailor the content and complexity to their level of understanding. Outline Your Content Break down the information into manageable sections. Create a storyboard to visualize the flow of the video. The Art and Technique of 3D Animation Step 2: Writing the Script Introduction Start with a hook to grab attention. Introduce the topic and state the objective clearly. Body Present information in a logical order. Use simple language and short sentences. Incorporate examples and analogies to explain complex concepts. Conclusion Summarize the key points. Provide a call to action or a thought-provoking statement. Step 3: Creating the Animation Choose Animation Software Select an animation tool that suits your skill level. Some popular options include: Blender (for 3D animations) Toon Boom Harmony (for 2D animations) Vyond (for quick and easy animations) Adobe After Effects (for more advanced animations) Design Characters and Scenes Create or choose characters that will deliver your content. Design backgrounds and scenes that are relevant to the topic. Animate Your Scenes Start with keyframes to define the major movements. Add in-between frames for smooth transitions. Use animation principles like timing, easing, and exaggeration to make the animation more engaging. Step 4: Adding Voiceover and Sound Effects Record the Voiceover Use a good quality microphone. Ensure clarity and proper pacing to match the animation. Edit the Voiceover Use audio editing software to remove any background noise and mistakes. Synchronize the voiceover with the animation. Incorporate Sound Effects and Music Add relevant sound effects to enhance the animation. Use background music to set the tone and keep the audience engaged. Step 5: Final Editing and Exporting Review and Edit Watch the video multiple times to catch any mistakes or areas for improvement. Edit for clarity and flow. Add Titles and Credits Include an engaging title at the beginning. Add credits at the end to acknowledge contributors. Export the Video Choose the appropriate format and resolution for your target platform (e.g., YouTube, educational websites). Ensure the final video maintains high quality.                                                     Game Animation Tutorials overview. Introduction Purpose of the Tutorial: Explain what the tutorial aims to achieve and who it is for. Importance of Animation in Games: Briefly discuss the role and impact of animation in the gaming industry. Chapter 1: Fundamentals of Game Animation Basic Principles of Animation: Cover the 12 principles of animation such as squash and stretch, anticipation, and timing. Understanding Game Engines: Introduce popular game engines like Unity, Unreal Engine, and how they handle animations. Animation Types in Games: Differentiate between character animations, environmental animations, and UI animations. Chapter 2: Character Animation Creating a Character Rig: Step-by-step guide on creating a skeleton for a game character. Animating a Walk Cycle: Detailed tutorial on how to animate a walk cycle, including keyframes and interpolation. Animating Actions and Interactions: How to animate jumping, running, attacking, and interacting with objects. Chapter 3: Environmental Animation Animating Objects and Props: Techniques for animating objects within the game world. Animating Natural Phenomena: Tutorials on animating elements like water, fire, and wind effects. Procedural Animation: Introduction to procedural animation techniques for dynamic environments. Chapter 4: Integration with Game Engines Exporting Animations: How to export animations from animation software (like Blender or Maya) to game engines. Setting Up Animation Controllers: Using animation controllers in Unity or Unreal Engine to manage animations. Testing and Tweaking Animations: Techniques for testing animations in-game and making necessary adjustments. Chapter 5: Advanced Topics Motion Capture: Introduction to using motion capture for game animations. Facial Animation: Techniques for creating realistic facial animations. Optimizing Animations: Tips on optimizing animations for better performance in games. Chapter 6: Case Studies and Examples Analysis of Popular Games: Breakdown of animation techniques used in popular games. Guest Tutorials: Contributions from other animators in the industry. Practical Projects: Guided projects to apply what has been learned. Conclusion Summary of Key Points: Recap of the main topics covered in the tutorial. Further Learning Resources: Recommendations for books, courses, and other tutorials. Q&A and Community Engagement: Encourage engagement through Q&A sessions, forums, or social media groups. Tools and Software Animation Software: Blender, Maya, 3ds Max, etc. Game Engines: Unity, Unreal Engine, Godot, etc. Plugins and Add-ons: Useful tools and plugins that can enhance the animation workflow. Tips for Creating Effective Tutorials Clear and Concise Instructions: Ensure instructions are easy to follow. Visual Aids: Use screenshots, videos, and diagrams to illustrate points. Interactive Elements: Include quizzes, exercises, and projects to reinforce learning. Beginner’s Guide to Animation Introduction Briefly introduce the world of animation and its significance in various media (movies, TV shows, games, advertisements). Highlight the goal of the guide: to provide a comprehensive overview for beginners eager to start their journey in animation. 1. Understanding Animation Definition of Animation: Explain what animation is and its different types (2D, 3D, stop-motion, motion graphics). History of Animation: A brief overview of the evolution of animation from early hand-drawn techniques to modern digital methods. 2. Types of Animation 2D Animation: Describe traditional hand-drawn animation, digital 2D animation, and key techniques (e.g., frame-by-frame,

Blog

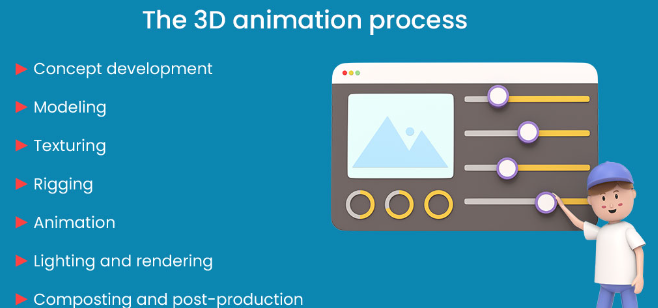
The Art and Technique of 3D Animation

Introduction:- The Art and Technique of 3D Animation In the ever-evolving world of animation, 3D animation stands out as a revolutionary technique that has transformed the landscape of visual storytelling. From the breathtakingly realistic worlds created in blockbuster movies to the immersive experiences in video games, 3D animation has become an indispensable tool for animators and artists. This comprehensive guide delves into the intricacies of 3D animation, exploring its history, technological advancements, and the creative process behind bringing three-dimensional characters and environments to life. Whether you’re a budding animator or an enthusiast, this article will provide valuable insights into the fascinating world of 3D animation. Animation Life Lessons Character Development: Creating interesting and relatable characters with distinct personalities, goals, and arcs. Plot and Narrative Structure: Developing a coherent and engaging storyline with a clear beginning, middle, and end. This includes elements such as conflict, climax, and resolution. Themes and Messages: Conveying underlying themes or messages, such as good vs. evil, love, friendship, bravery, or perseverance. Visual Storytelling: Using visual elements like color, lighting, and animation techniques to enhance the narrative and evoke emotions. World-Building: Creating immersive and believable worlds that set the stage for the story, whether it’s a fantastical realm or a realistic environment. Dialogue and Voice Acting: Crafting meaningful dialogue that advances the plot and develops characters, supported by expressive voice acting. Pacing and Timing: Managing the rhythm and flow of the story to maintain audience interest and ensure that key moments have the desired impact. Genre and Style: Adhering to or subverting genre conventions, such as action, adventure, comedy, drama, fantasy, sci-fi, etc., to shape the tone and direction of the story.                                                                       what is animation for students Introduction to Animation Definition: Animation is the process of creating the illusion of motion and change by rapidly displaying a sequence of static images that minimally differ from each other. It can be done using various techniques, including hand-drawn (traditional), computer-generated (CGI), stop-motion, and more. Types of Animation Traditional Animation: Also known as 2D animation, this involves hand-drawing each frame. Classic examples include Disney’s early films like “Snow White and the Seven Dwarfs.” 3D Animation: Created using computer software, 3D animation allows for more realistic and complex visuals. Pixar movies like “Toy Story” are prime examples. Stop-Motion Animation: This technique involves physically manipulating objects and photographing them frame by frame. “Wallace and Gromit” and “Coraline” are well-known examples. Motion Graphics: Often used in multimedia projects, motion graphics involve animating graphic elements, like text and logos, commonly seen in commercials and title sequences. Cut-Out Animation: This is a form of stop-motion where characters and backgrounds are made from flat materials like paper, exemplified by shows like “South Park.” Tools and Software Traditional Tools: Pencils, paper, light tables, and celluloid sheets. Digital Tools: Software like Adobe Animate, Toon Boom Harmony, Blender (for 3D), and After Effects for motion graphics. Learning Animation Basic Principles: Understanding the fundamental principles of animation is crucial. These include: Squash and Stretch: Giving a sense of weight and flexibility to objects. Anticipation: Preparing the audience for an action. Staging: Presenting an idea so it’s unmistakably clear. Straight Ahead Action and Pose to Pose: Different approaches to creating movement. Follow Through and Overlapping Action: The parts of a body continue moving after the body stops. Slow In and Slow Out: The movement starts slowly, accelerates, and then decelerates. Arcs: Most natural actions follow an arched trajectory. Secondary Action: Adding additional actions to support the main action. Timing: The number of frames for a given action. Exaggeration: Accentuating actions to convey a clearer emotion or action. Solid Drawing: Understanding the basics of drawing, including anatomy, weight, and volume. Appeal: Characters should be visually engaging. Educational Path High School Courses: Many high schools offer introductory courses in digital media, art, and animation. College Programs: Degrees in animation, digital media, or related fields can provide in-depth training. Institutions like CalArts, Savannah College of Art and Design, and Ringling College of Art and Design are renowned for their animation programs. Online Courses: Platforms like Coursera, Udemy, and Khan Academy offer courses in various animation techniques and software. Benefits of Studying Animation Creative Expression: Animation allows students to bring their ideas and stories to life. Technical Skills: Learning animation involves mastering various software and tools. Problem-Solving: Animators often need to find creative solutions to visual challenges. Collaboration: Animation projects often require teamwork, teaching students to work effectively with others. Career Opportunities Animator: Working in film, TV, video games, or advertising. Storyboard Artist: Creating storyboards for visualizing sequences of a story. Character Designer: Designing characters for various media. Visual Effects Artist: Creating visual effects for movies, TV shows, and commercials. Game Designer: Developing characters and environments for video games.                                                                       13 unique animation ideas The Evolution of Animation: From Traditional to Digital Explore the history of animation, from early techniques like flipbooks and hand-drawn frames to the latest digital innovations in CGI and motion capture. 2. The Role of Sound in Animation Discuss how sound effects, music, and voice acting enhance the storytelling and emotional impact of animated films and series. 3. Character Design: Bringing Personalities to Life Dive into the process of creating memorable characters, covering aspects like conceptualization, personality development, and visual design. 4. The Art of Background Animation Examine the importance of background art in animation, including techniques for creating immersive environments and how they contribute to the narrative. 5. Animating Emotions: Conveying Feelings Through Movement Analyze how animators use body language, facial expressions, and timing to convey complex emotions and enhance character development. 6. Stop Motion Animation: Crafting Stories Frame by

Blog

Animation Life Lessons

Animation Life Lessons Introduction Animation is more than just bringing drawings to life—it’s a journey of creativity, discipline, and continuous learning. Over the years, animators acquire invaluable lessons that transcend the digital canvas, impacting their lives and work in profound ways. In this blog post, we will explore some of the most important life lessons that animation teaches, drawing from both personal experiences and insights from industry professionals. 1. Patience and Persistence Animation is a meticulous art form that requires a significant amount of time and effort. Whether it’s perfecting a walk cycle or tweaking the lighting in a 3D scene, patience is essential. Persistence in the face of challenges and setbacks is equally important. Many successful animators attribute their achievements to their ability to keep pushing forward despite obstacles. Patience in Detail: The devil is in the details. Each frame needs attention, and sometimes, achieving the perfect shot can take hours or even days. Persistence in Practice: Continuous practice and refinement of skills are necessary. Animators must be persistent in learning new techniques and software. 2. Creative Problem-Solving Every animation project comes with its own set of challenges, requiring innovative solutions. Whether it’s finding a way to make a character’s movement more natural or overcoming technical limitations, animators must think creatively to solve problems. Thinking Outside the Box: Often, the best solutions come from unconventional thinking. Collaboration and Brainstorming: Working with a team can provide new perspectives and ideas, enhancing the problem-solving process. Exploring the Fusion of 2D Animation in 3D Space 3. Attention to Detail Animation demands a keen eye for detail. Small nuances can make a significant difference in the final product, and animators learn to focus on the finer points of their work. Fine-Tuning Movements: Every subtle movement needs to be just right to create a believable animation. Visual Consistency: Ensuring that all elements within a scene are consistent and harmonious is crucial. 4. Time Management Balancing multiple projects, meeting deadlines, and managing time effectively are crucial skills for animators. Proper time management ensures that projects are completed on schedule without compromising quality. Project Planning: Breaking down tasks and setting realistic timelines helps in managing large projects. Avoiding Burnout: Proper time management also involves taking breaks and maintaining a healthy work-life balance to prevent burnout. 5. Embracing Feedback and Criticism Receiving and implementing feedback is a vital part of the animation process. Constructive criticism helps animators improve their work and grow professionally. Learning from Mistakes: Each piece of feedback is an opportunity to learn and improve. Thick Skin: Developing the ability to take criticism positively is essential for personal and professional growth. 6. Adaptability The animation industry is constantly evolving with new technologies, software, and techniques. Animators must be adaptable and willing to learn continuously. Staying Updated: Keeping up with industry trends and new tools is crucial. Flexibility in Workflow: Being open to changing workflows and trying new methods can lead to better results. 7. Passion and Dedication Passion for animation drives animators to dedicate countless hours to their craft. This dedication often results in the creation of exceptional work that stands out. Intrinsic Motivation: Passion fuels the desire to improve and create. Pride in Work: The satisfaction of seeing a finished project is a rewarding experience that justifies the hard work and dedication.  traditional animation Introduction Briefly introduce traditional animation. Mention its historical significance and impact on the animation industry. State the purpose of the blog post and what readers can expect to learn. 1. The History of Traditional Animation Early beginnings (e.g., cave paintings, shadow puppetry). The advent of film and the first animated shorts. The Golden Age of Animation (1920s-1960s). Key milestones and influential figures (e.g., Walt Disney, Winsor McCay). 2. Techniques and Processes Hand-drawn animation: the process of creating each frame by hand. The role of storyboards and animatics. Inking and painting: the transition from paper to cel animation. The importance of timing and frame rates. 3. Tools and Materials Traditional tools: pencils, paper, ink, and paint. Animation stands and cameras. Evolution to digital tools while maintaining traditional techniques. 4. Notable Works and Studios Classic films and shorts (e.g., “Steamboat Willie,” “Snow White and the Seven Dwarfs”). Renowned studios (e.g., Disney, Warner Bros., Studio Ghibli). Analysis of iconic scenes and what makes them stand out. 5. The Decline and Resurgence The decline of traditional animation in favor of CGI in the late 20th century. The resurgence and appreciation of traditional animation in modern times. Examples of contemporary works that use traditional techniques (e.g., “The Princess and the Frog,” “Klaus”). 6. The Future of Traditional Animation The blending of traditional and digital techniques. The role of independent animators and small studios. Predictions for the future and the potential revival of the craft. Conclusion Recap the significance of traditional animation. Reflect on its timeless appeal and influence on modern animation. Encourage readers to explore traditional animation further and appreciate its artistry. Writing Tips Use engaging language to keep the reader’s interest. Include visuals such as images of classic animation frames, tools, and behind-the-scenes photos. Provide anecdotes and quotes from famous animators to add depth and personal touch. Ensure each section flows smoothly into the next, maintaining a coherent narrative. Bringing Nature to Life: Animating Natural Events Introduction: Animating natural events is a fascinating and challenging endeavor that combines artistic creativity with scientific precision. Whether it’s the majestic unfolding of a blooming flower, the relentless power of a thunderstorm, or the serene dance of ocean waves, capturing the essence of these phenomena in animation requires a deep understanding of both the subject and the tools at an animator’s disposal. In this blog post, we will explore the intricacies of animating natural events, providing insights into the techniques, tools, and thought processes that go into creating these stunning visual experiences. From understanding the physics behind natural movements to utilizing animation software like Blender and Maya, this comprehensive guide will equip you with the knowledge and inspiration to bring the beauty of nature to life through

Blog

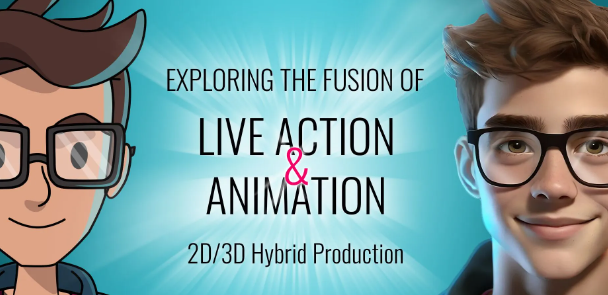
Exploring the Fusion of 2D Animation in 3D Space

Introduction:-Exploring the Fusion of 2D Animation in 3D Space In the dynamic world of animation, the boundaries between 2D and 3D art forms have increasingly blurred, creating a fascinating hybrid that allows artists to explore new creative dimensions. The concept of creating 2D animation within a 3D space has gained significant traction, offering unique visual styles and storytelling possibilities. This innovative approach not only enhances the depth and complexity of animations but also provides artists with unprecedented flexibility in their creative processes. Traditionally, 2D animation has been confined to flat, two-dimensional planes, while 3D animation has thrived in three-dimensional environments, allowing for realistic movement and spatial depth. However, advancements in technology and software have paved the way for a seamless integration of 2D and 3D elements, enabling animators to harness the strengths of both dimensions. This synergy creates a new genre of animation that can evoke emotions, convey stories, and captivate audiences in ways that were once unimaginable. In this exploration, we will delve into the techniques, tools, and workflows that make 2D animation in 3D space possible. We will examine the software that supports this creative fusion, the principles of animation that guide its execution, and the practical applications that showcase its potential. Whether you are an aspiring animator, a seasoned professional, or simply a curious enthusiast, this journey will illuminate the exciting possibilities of blending 2D and 3D animation, offering insights and inspiration for your own projects. Introduction Hook: Introduce the topic with a compelling fact or question about 2D animation. Context: Briefly explain Blender and its typical association with 3D animation. Thesis: State that the article will explore whether Blender is a viable tool for 2D animation. Mastering CSS Animations: A Step-by-Step Guide Section 1: Overview of Blender History and Development: Brief history of Blender and its evolution. Current Capabilities: Outline Blender’s capabilities, focusing on 2D and 3D animation. Section 2: Blender’s 2D Animation Features Grease Pencil Tool: In-depth explanation of the Grease Pencil, Blender’s primary tool for 2D animation. Drawing and Rigging: Discuss how drawing and rigging work in Blender. Animation Workflow: Describe the workflow for creating 2D animations using Blender. Section 3: Comparison with Other 2D Animation Software Toon Boom Harmony: Compare Blender with Toon Boom Harmony in terms of features, ease of use, and cost. Adobe Animate: Discuss how Blender stacks up against Adobe Animate. Krita and OpenToonz: Provide comparisons with other free/open-source options. Section 4: Case Studies and Examples Successful Projects: Highlight successful 2D animations created with Blender. Testimonials: Include quotes from animators who use Blender for 2D animation. Tutorials and Learning Resources: List some popular tutorials and resources for learning 2D animation in Blender. Section 5: Pros and Cons of Using Blender for 2D Animation Advantages: List the benefits of using Blender for 2D animation (e.g., cost, versatility, community support). Disadvantages: Discuss the limitations or challenges (e.g., learning curve, specialized features in other software). Section 6: Practical Tips for Using Blender for 2D Animation Setting Up: Guide on how to set up Blender for 2D animation. Best Practices: Share tips and best practices for efficient workflow. Troubleshooting Common Issues: Provide solutions for common problems encountered in 2D animation with Blender. Conclusion Summary: Recap the main points discussed in the article. Final Verdict: Conclude with a balanced view on whether Blender is a good tool for 2D animation. Call to Action: Encourage readers to try Blender for their 2D animation projects and share their experiences. Draft Article Is Blender Good for 2D Animations? Blender is often celebrated for its powerful 3D modeling and animation capabilities, but did you know it’s also a formidable tool for 2D animation? With its versatile features and the revolutionary Grease Pencil tool, Blender has carved a niche for itself in the 2D animation industry. In this article, we will explore the strengths and weaknesses of using Blender for 2D animation, compare it with other popular 2D animation software, and provide practical tips for getting started. Overview of Blender History and Development Blender, an open-source 3D creation suite, has been around since 1994. Initially developed by Ton Roosendaal, Blender has evolved dramatically over the years. Today, it’s a comprehensive tool used by professionals and hobbyists alike for everything from modeling and sculpting to rendering and animation. Current Capabilities While Blender is predominantly known for its 3D capabilities, it also offers robust tools for 2D animation, primarily through the Grease Pencil. This tool allows artists to create 2D animations within a 3D environment, blending the boundaries between the two dimensions. Blender’s 2D Animation Features Grease Pencil Tool The Grease Pencil is Blender’s star feature for 2D animation. It enables users to draw in 3D space, create 2D animations, and integrate them with 3D elements. This versatility allows for unique creative possibilities, making it a standout feature for animators looking to push the boundaries of traditional 2D animation. Drawing and Rigging In Blender, drawing is done using the Grease Pencil, which offers various brushes and tools to create detailed and dynamic animations. Rigging in 2D is also possible, allowing animators to create complex movements and interactions between characters and objects. Animation Workflow Blender’s workflow for 2D animation is streamlined and efficient. Animators can create keyframes, use onion skinning for frame-by-frame animation, and take advantage of Blender’s powerful timeline and graph editor to refine their animations. Comparison with Other 2D Animation Software Toon Boom Harmony Toon Boom Harmony is a leading name in 2D animation, widely used in the industry. While Harmony offers specialized features and a user-friendly interface, it comes with a hefty price tag. Blender, on the other hand, is free and open-source, making it an attractive option for independent animators and studios on a budget. Adobe Animate Adobe Animate, formerly known as Flash, is another popular tool for 2D animation. It excels in web animation and interactive content creation. However, Blender’s Grease Pencil offers more flexibility for traditional 2D animation and is seamlessly integrated with Blender’s 3D tools. Krita and OpenToonz Krita and OpenToonz are other notable free/open-source

Blog

Mastering CSS Animations: A Step-by-Step Guide

CSS Animations:- Mastering CSS Animations: A Step-by-Step Guide <!DOCTYPE html> <html lang=”en”> <head> <meta charset=”UTF-8″> <meta name=”viewport” content=”width=device-width, initial-scale=1.0″> <style> .box { width: 100px; height: 100px; background-color: red; position: relative; animation: moveBox 2s infinite; } @keyframes moveBox { 0% { left: 0; } 50% { left: 200px; } 100% { left: 0; } } </style> <title>CSS Animation</title> </head> <body> <div class=”box”></div> </body> </html> JavaScript Animations with Canvas: <!DOCTYPE html> <html lang=”en”> <head> <meta charset=”UTF-8″> <meta name=”viewport” content=”width=device-width, initial-scale=1.0″> <title>Canvas Animation</title> <style> canvas { border: 1px solid black; } </style> </head> <body> <canvas id=”myCanvas” width=”400″ height=”400″></canvas> <script> const canvas = document.getElementById(‘myCanvas’); const ctx = canvas.getContext(‘2d’); let x = 0; let y = 0; let dx = 2; let dy = 2; function draw() { ctx.clearRect(0, 0, canvas.width, canvas.height); ctx.beginPath(); ctx.arc(x, y, 20, 0, Math.PI * 2); ctx.fillStyle = ‘blue’; ctx.fill(); ctx.closePath(); if (x + dx > canvas.width || x + dx < 0) { dx = -dx; } if (y + dy > canvas.height || y + dy < 0) { dy = -dy; } x += dx; y += dy; requestAnimationFrame(draw); } draw(); </script> </body> </html> Using JavaScript Libraries like GSAP: <!DOCTYPE html> <html lang=”en”> <head> <meta charset=”UTF-8″> <meta name=”viewport” content=”width=device-width, initial-scale=1.0″> <title>GSAP Animation</title> <script src=”https://cdnjs.cloudflare.com/ajax/libs/gsap/3.9.1/gsap.min.js”></script> <style> .box { width: 100px; height: 100px; background-color: green; position: absolute; } </style> </head> <body> <div class=”box”></div> <script> gsap.to(“.box”, {x: 300, duration: 2, repeat: -1, yoyo: true}); </script> </body> </html> Three.js for 3D Animations: <!DOCTYPE html> <html lang=”en”> <head> <meta charset=”UTF-8″> <meta name=”viewport” content=”width=device-width, initial-scale=1.0″> <title>Three.js Animation</title> <script src=”https://cdnjs.cloudflare.com/ajax/libs/three.js/r128/three.min.js”></script> </head> <body> <script> const scene = new THREE.Scene(); const camera = new THREE.PerspectiveCamera(75, window.innerWidth / window.innerHeight, 0.1, 1000); const renderer = new THREE.WebGLRenderer(); renderer.setSize(window.innerWidth, window.innerHeight); document.body.appendChild(renderer.domElement); const geometry = new THREE.BoxGeometry(); const material = new THREE.MeshBasicMaterial({ color: 0x00ff00 }); const cube = new THREE.Mesh(geometry, material); scene.add(cube); camera.position.z = 5; function animate() { requestAnimationFrame(animate); cube.rotation.x += 0.01; cube.rotation.y += 0.01; renderer.render(scene, camera); } animate(); </script> </body> </html> Animating with JavaScript: From Basics to Advanced Techniques Animation is a powerful tool in web development that enhances user experience by making interfaces more engaging and interactive. JavaScript, being a versatile and widely-used programming language, offers robust capabilities for creating animations. In this comprehensive guide, we’ll explore JavaScript animations from basic concepts to advanced techniques, providing a step-by-step approach to mastering web animations. Introduction Animations play a critical role in modern web design. They can draw attention, provide feedback, and create a smoother and more enjoyable user experience. JavaScript, alongside HTML and CSS, offers various methods and libraries to create animations that range from simple transitions to complex, interactive graphics. This guide will cover the fundamentals of JavaScript animations, delve into the canvas API, explore the use of libraries like GSAP, and touch on performance optimization techniques. Basics of JavaScript Animations 1. Using CSS Animations with JavaScript While CSS alone can handle many animations, JavaScript provides more control and flexibility. By manipulating CSS properties through JavaScript, you can create dynamic animations that respond to user interactions. <!DOCTYPE html> <html lang=”en”> <head> <meta charset=”UTF-8″> <meta name=”viewport” content=”width=device-width, initial-scale=1.0″> <style> .box { width: 100px; height: 100px; background-color: red; position: absolute; } </style> <title>CSS with JavaScript Animation</title> </head> <body> <div class=”box”></div> <script> const box = document.querySelector(‘.box’); let position = 0; function animate() { position += 1; box.style.left = position + ‘px’; if (position < window.innerWidth – 100) { requestAnimationFrame(animate); } } animate(); </script> </body> </html> Basic JavaScript Animations with setInterval Using setInterval is a simple way to create animations by repeatedly executing a function at fixed intervals. <!DOCTYPE html> <html lang=”en”> <head> <meta charset=”UTF-8″> <meta name=”viewport” content=”width=device-width, initial-scale=1.0″> <style> .circle { width: 50px; height: 50px; background-color: blue; border-radius: 50%; position: absolute; } </style> <title>Basic JavaScript Animation</title> </head> <body> <div class=”circle”></div> <script> const circle = document.querySelector(‘.circle’); let posX = 0; let posY = 0; function moveCircle() { posX += 2; posY += 2; circle.style.left = posX + ‘px’; circle.style.top = posY + ‘px’; if (posX < window.innerWidth – 50 && posY < window.innerHeight – 50) { setTimeout(moveCircle, 10); } } moveCircle(); </script> </body> </html> Advanced Timing Functions with requestAnimationFrame requestAnimationFrame is the preferred way to create smooth animations, as it synchronizes with the display refresh rate, providing more efficient and visually pleasing animations. <!DOCTYPE html> <html lang=”en”> <head> <meta charset=”UTF-8″> <meta name=”viewport” content=”width=device-width, initial-scale=1.0″> <style> .square { width: 100px; height: 100px; background-color: green; position: absolute; } </style> <title>requestAnimationFrame Animation</title> </head> <body> <div class=”square”></div> <script> const square = document.querySelector(‘.square’); let posX = 0; function moveSquare() { posX += 2; square.style.left = posX + ‘px’; if (posX < window.innerWidth – 100) { requestAnimationFrame(moveSquare); } } moveSquare(); </script> </body> </html> Intermediate Techniques 4. Animating with the Canvas API The HTML5 Canvas API allows for complex and high-performance animations by providing a drawable region in your web page. <!DOCTYPE html> <html lang=”en”> <head> <meta charset=”UTF-8″> <meta name=”viewport” content=”width=device-width, initial-scale=1.0″> <title>Canvas Animation</title> <style> canvas { border: 1px solid black; } </style> </head> <body> <canvas id=”myCanvas” width=”500″ height=”500″></canvas> <script> const canvas = document.getElementById(‘myCanvas’); const ctx = canvas.getContext(‘2d’); let x = 0; let y = 0; let dx = 2; let dy = 2; function draw() { ctx.clearRect(0, 0, canvas.width, canvas.height); ctx.beginPath(); ctx.arc(x, y, 20, 0, Math.PI * 2); ctx.fillStyle = ‘blue’; ctx.fill(); ctx.closePath(); if (x + dx > canvas.width || x + dx < 0) { dx = -dx; } if (y + dy > canvas.height || y + dy < 0) { dy = -dy; } x += dx; y += dy; requestAnimationFrame(draw); } draw(); </script> </body> </html> Using GSAP for Advanced Animations GSAP (GreenSock Animation Platform) is a powerful JavaScript library for creating high-performance animations. <!DOCTYPE html> <html lang=”en”> <head> <meta charset=”UTF-8″> <meta name=”viewport” content=”width=device-width, initial-scale=1.0″> <title>GSAP Animation</title> <script src=”https://cdnjs.cloudflare.com/ajax/libs/gsap/3.9.1/gsap.min.js”></script> <style> .box { width: 100px; height: 100px; background-color: purple; position: absolute; } </style> </head> <body> <div class=”box”></div> <script> gsap.to(“.box”, {x: 400, duration: 2, repeat: -1, yoyo: true}); </script> </body> </html> Advanced Techniques 6. Complex Animations with Three.js Three.js is a popular library for creating 3D animations and graphics using WebGL. <!DOCTYPE html> <html lang=”en”> <head> <meta

Blog

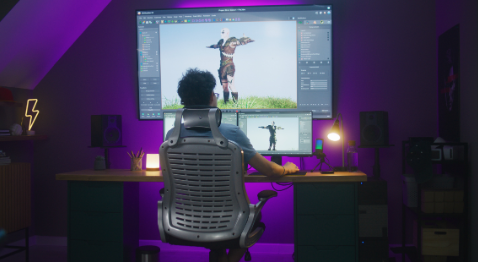
Animation in Game Design: An In-Depth Course

Introduction:- Animation in Game Design: An In-Depth Course Brief overview of the importance of animation in game design. Explanation of the course’s goals and who it is for. Teaser of what the readers will learn. 1. The Role of Animation in Game Design Definition and importance of animation in the gaming industry. Historical evolution of animation in video games. Examples of iconic games known for their animation. 2. Basic Principles of Animation Introduction to the 12 principles of animation (Squash and Stretch, Anticipation, Staging, etc.). How these principles apply specifically to game design. Illustrations or examples from popular games. 3. Tools and Software for Animation Overview of essential software (e.g., Unity, Unreal Engine, Blender). Comparison of different tools and their uses in game design. Tips for choosing the right software for your needs. 4. Animation Techniques in 2D and 3D Games Differences between 2D and 3D animation in games. Techniques and best practices for creating smooth animations. Case studies of games that excel in 2D and 3D animation. 5. The Animation Pipeline Detailed walkthrough of the animation pipeline from concept to implementation. Storyboarding, rigging, keyframing, and rendering. Collaboration between animators, designers, and programmers. 6. Integrating Animation with Game Mechanics How animation enhances gameplay and player experience. Examples of animations tied to game mechanics (e.g., character movement, combat). Tips for seamless integration of animation and interactivity. 7. Challenges and Solutions in Game Animation Common challenges faced by game animators (e.g., performance optimization, technical constraints). Solutions and workarounds for these challenges. Insights from professional animators in the industry. 8. Future Trends in Game Animation Emerging technologies and their impact on game animation (e.g., AI, VR, AR). Predictions for the future of animation in game design. Encouragement for readers to stay updated and continue learning. Conclusion Recap of key points covered in the course introduction. Final thoughts on the importance of animation in game design. Call to action: Encouraging readers to enroll in the course and start animating. Introduction Animation is a cornerstone of immersive and engaging video games. From the fluid movements of a character to the dynamic environments they navigate, animation breathes life into digital worlds. This course is designed for aspiring animators and game designers eager to master the art and science of animation in game development. Throughout this course, you will learn essential principles, techniques, and tools that will help you create captivating animations. Let’s dive in and explore the exciting world of game animation. The Role of Animation in Game Design Animation is integral to the storytelling and user experience in games. It helps convey emotions, actions, and narrative in ways that static images or text cannot. Over the years, animation has evolved from simple pixelated sprites to highly detailed and realistic characters. Games like “The Legend of Zelda: Breath of the Wild” and “Cuphead” are celebrated for their exceptional animation work, setting new standards for the industry. Animation not only enhances visual appeal but also plays a critical role in gameplay mechanics and player engagement. Basic Principles of Animation Understanding the 12 principles of animation is crucial for any animator. These principles, developed by Disney animators, include Squash and Stretch, Anticipation, Staging, Straight Ahead Action and Pose to Pose, Follow Through and Overlapping Action, Slow In and Slow Out, Arc, Secondary Action, Timing, Exaggeration, Solid Drawing, and Appeal. Each principle serves to make animations more realistic and expressive. For instance, “Squash and Stretch” gives a sense of weight and flexibility, which is essential for characters’ believability. In game design, these principles help create animations that are not only visually appealing but also enhance gameplay. Tools and Software for Animation To create high-quality animations, you need the right tools. Popular software includes Unity, Unreal Engine, Blender, Maya, and Spine. Unity and Unreal Engine are widely used for both 2D and 3D games, offering robust animation tools and extensive libraries. Blender, an open-source 3D creation suite, is excellent for modeling, rigging, animation, and rendering. Maya, a professional-grade software, is favored for its advanced animation capabilities. Spine is specifically designed for 2D animation and is particularly useful for mobile and indie games. Choosing the right software depends on your project’s requirements and your personal preference. Animation Techniques in 2D and 3D Games Animating in 2D and 3D presents unique challenges and opportunities. 2D animation, often used in platformers and indie games, relies heavily on frame-by-frame animation and rigging. Techniques such as parallax scrolling create a sense of depth and motion. On the other hand, 3D animation involves modeling, rigging, and animating characters and environments in a three-dimensional space. Motion capture technology is commonly used to achieve realistic movements. Games like “Ori and the Blind Forest” and “Overwatch” showcase the best of both 2D and 3D animation techniques, setting benchmarks for aspiring animators. The Animation Pipeline The animation pipeline is a step-by-step process that takes an animation from concept to completion. It begins with storyboarding, where animators create a visual script of the animation. Next is rigging, which involves creating a skeleton for 3D models to facilitate movement. Keyframing is the process of defining the start and end points of an animation, while in-between frames are filled in to create smooth transitions. Rendering is the final step, where the animation is processed and exported for use in the game. Collaboration between animators, designers, and programmers is crucial at every stage to ensure a seamless integration of animations into the game. Integrating Animation with Game Mechanics Animation significantly enhances gameplay by providing visual feedback and making interactions more intuitive. For instance, a character’s animation when jumping, attacking, or taking damage can provide players with crucial information about their actions and the game’s state. Well-integrated animations can make controls feel more responsive and the game world more immersive. Games like “Hollow Knight” and “Dark Souls” use animation to create a tight connection between player input and character actions, resulting in a satisfying gameplay experience. Tips for integration include ensuring animations do not interfere with gameplay mechanics and maintaining consistency in style and

Blog

Mastering the Morph Transition in Animation

Introduction: Animation is a powerful storytelling tool that brings characters Mastering the Morph Transition in Animation and objects to life, creating captivating narratives that engage audiences. One of the most mesmerizing techniques in animation is the Morph transition. This effect allows one shape or object to smoothly transform into another, creating a seamless and visually appealing transition that can enhance the overall aesthetic of your animation. Whether you’re a seasoned animator or just starting out, mastering the Morph transition can elevate your projects and impress your viewers. In this comprehensive guide, we’ll delve into the intricacies of setting up a Morph transition, step by step, ensuring you have all the knowledge and tools needed to implement this technique effectively. 1. Understanding Morph Transitions Before diving into the technical aspects, it’s essential to understand what Morph transitions are and how they can be used effectively in animation. A Morph transition, also known as shape morphing, is a visual effect in which one image or shape gradually changes into another. This technique is widely used in various forms of media, including films, TV shows, advertisements, and online content. 2. Tools You’ll Need To create a Morph transition, you’ll need animation software that supports this feature. Some of the most popular options include: Adobe After Effects Blender Adobe Animate Toon Boom Harmony Synfig Studio Each of these programs offers unique features and capabilities, but the fundamental principles of creating a Morph transition remain consistent across platforms. 3. Setting Up Your Workspace Before you start animating, it’s crucial to set up your workspace for efficiency. Here’s how: Import Your Assets: Load the images or shapes you want to morph into your animation software. Ensure they are in high resolution for the best quality. Organize Your Layers: Arrange your assets in separate layers. This organization will help you manage the morphing process more effectively. Define Keyframes: Identify the start and end points of your Morph transition by setting keyframes. These frames will mark the initial and final states of your transition. The Art of Animating Text and Objects 4. Creating the Morph Transition Now that your workspace is set up, let’s dive into the process of creating the Morph transition. Step 1: Select Your Starting and Ending Shapes Choose the shapes or objects that will serve as the beginning and end points of your transition. These could be anything from simple geometric shapes to complex characters or objects. Step 2: Create Intermediate Shapes To ensure a smooth transition, you’ll need to create intermediate shapes that bridge the gap between the starting and ending shapes. These intermediate shapes, or “in-betweens,” help maintain the continuity of the morph. Step 3: Use Shape Tweening Most animation software offers a feature called shape tweening, which automatically generates the intermediate frames between two keyframes. Here’s how to use it: Adobe After Effects: Use the “Shape Morph” tool under the “Effects” menu. Blender: Use the “Shape Keys” function to create intermediate shapes. Adobe Animate: Use the “Shape Tween” tool to generate the transition frames. Step 4: Adjust Control Points Fine-tune the transition by adjusting the control points of your shapes. These points determine how the shapes morph and can be manipulated to create a smoother transition. 5. Refining the Transition Once you’ve created the basic Morph transition, it’s time to refine it for a polished final product. Step 1: Add Easing Easing refers to the gradual acceleration or deceleration of the transition. Adding easing can make your morph look more natural and less mechanical. Most animation software allows you to adjust easing through the keyframe editor or graph editor. Step 2: Smooth Out Irregularities Inspect your morph transition for any irregularities or abrupt changes. Use tools like the pen tool or path editor to smooth out these inconsistencies. Step 3: Add Details and Effects Enhance your Morph transition by adding details and effects. This could include: Motion Blur: Adds a realistic blur effect to fast-moving transitions. Color Transitions: Gradually change the color of your shapes during the morph. Additional Animations: Incorporate secondary animations to complement the main morph transition. 6. Testing and Finalizing Before exporting your animation, it’s crucial to test the Morph transition thoroughly. Step 1: Preview the Animation Use the preview function in your animation software to watch the Morph transition in real-time. Pay attention to the flow and smoothness of the transition. Step 2: Make Necessary Adjustments Based on your preview, make any necessary adjustments to the keyframes, control points, or easing settings. Step 3: Render the Final Animation Once you’re satisfied with the transition, render the final animation. Choose the appropriate settings for resolution, frame rate, and format to ensure the best quality. 7. Practical Applications of Morph Transitions Morph transitions can be used in various creative ways to enhance your animations. Here are a few practical applications: Character Transformations: Seamlessly transform one character into another. Logo Animations: Morph between different logos or graphical elements. Scene Transitions: Create smooth transitions between different scenes or backgrounds. Educational Videos: Demonstrate processes or changes over time in an engaging manner. Exploring the Magic of Arcade Games Through Animation In the vibrant world of gaming, few realms capture the essence of nostalgia and innovation like arcade games. From the rhythmic dance of pixels to the immersive narratives woven through colorful screens, arcade games have shaped generations and continue to inspire modern creators. In this journey through animation, we delve deep into the heart of arcade games, exploring how these digital marvels have evolved from simple lines and blips to intricate, story-driven experiences brought to life through animation. Introduction: Arcade games are not just a collection of pixels on a screen; they are portals to different eras, each pulsating with its own unique charm and challenge. The mesmerizing bleeps and bloops that once echoed through dimly lit arcades have now transformed into symphonies of sound and light in the digital age. As an animator and enthusiast of these timeless creations, I embark on a quest to uncover the secrets behind their

Blog

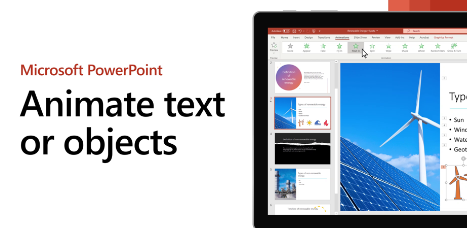
The Art of Animating Text and Objects

Introduction Outline Introduction Importance of animation in digital content Overview of animating text and objects Purpose of the blog post History of Animation Early techniques in animation Evolution of animation in digital media Key milestones in text and object animation Types of Animation 2D Animation 3D Animation Motion Graphics Stop Motion Examples of each type in animating text and objects Tools and Software for Animation Popular software for text and object animation Features of each tool Pros and cons Comparison of different tools Techniques for Animating Text Basic text animations (fade in/out, slide, bounce) Advanced text animations (typewriter effect, morphing) Using CSS for web animations Best practices for animating text Techniques for Animating Objects Basic object animations (rotation, scaling, movement) Advanced object animations (3D transformations, physics-based animations) Keyframe animation Best practices for animating objects Applications of Text and Object Animation Web design Marketing and advertisements Educational content Social media and content creation Trends in Text and Object Animation Current trends and styles Influence of technology on animation trends Future predictions Conclusion Recap of key points Importance of staying updated with animation trends Encouragement to experiment and be creative Blog Post Title: The Art of Animating Text and Objects: Techniques, Tools, and Trend Introduction Animation has become an integral part of digital content, transforming static designs into dynamic and engaging experiences. Whether you’re creating a website, an advertisement, or educational material, the ability to animate text and objects can make your content more appealing and effective. In this comprehensive guide, we will explore the world of animating text and objects, delving into the history, techniques, tools, and trends that define this exciting field. By the end of this post, you’ll have a thorough understanding of how to bring your digital content to life through animation. History of Animation Creating a Character Blowing Up a Balloon The journey of animation began long before the advent of digital technology. Early animation techniques, such as the thaumatrope and zoetrope, laid the foundation for modern animation. These devices used a series of images to create the illusion of motion, captivating audiences with their simple yet magical effects. As technology progressed, so did the complexity of animations. The advent of film and later, digital technology, revolutionized the way animations were created and consumed. In the realm of text and object animation, milestones such as the introduction of Adobe Flash in the late 1990s and the rise of HTML5 in the 2010s significantly impacted how animations were implemented on the web. These technologies enabled designers to create more sophisticated and interactive animations, pushing the boundaries of what was possible. Today, with powerful software and advanced techniques, animating text and objects has become more accessible and versatile than ever before. Types of Animation Animation comes in various forms, each with its unique characteristics and applications. Understanding the different types of animation is crucial for selecting the right approach for your project. 2D Animation 2D animation involves creating movement in a two-dimensional space. It’s the classic form of animation seen in cartoons and is widely used in web design and motion graphics. Techniques such as keyframing and tweening are commonly used to animate text and objects in 2D. 3D Animation 3D animation adds depth to the animation, creating a more realistic and immersive experience. It’s extensively used in video games, films, and virtual reality. Animating objects in 3D involves modeling, rigging, and rendering, which can bring text and objects to life with stunning realism. Motion Graphics Motion graphics combine graphic design and animation to create visually appealing content. They are often used in advertising, explainer videos, and UI/UX design. Text animations in motion graphics can include kinetic typography, where text moves dynamically to convey information. Stop Motion Stop motion is a technique where objects are physically manipulated and photographed frame by frame to create the illusion of movement. While less common for text animation, it can be used creatively to animate objects in a tactile and unique way. Each type of animation offers different possibilities and can be used to achieve various effects, from simple transitions to complex storytelling. Tools and Software for Animation Choosing the right tool for animating text and objects is essential for achieving the desired results. There are several popular software options, each with its own strengths and features. Adobe After Effects Adobe After Effects is a powerful tool for creating motion graphics and visual effects. It’s widely used for animating text and objects, offering advanced features such as keyframing, expressions, and 3D capabilities. Pros: Versatile and feature-rich Integrates well with other Adobe Creative Cloud apps Extensive library of plugins and templates Cons: Steep learning curve Requires a subscription Blender Blender is a free, open-source 3D animation software that also supports 2D animation. It’s a comprehensive tool for creating high-quality animations with robust modeling, rigging, and rendering capabilities. Pros: Free and open-source Comprehensive 3D and 2D animation features Active community and extensive tutorials Cons: Complex interface Requires significant time to master CSS and JavaScript (for Web Animations) For web animations, CSS and JavaScript are essential tools. CSS animations are great for simple transitions and effects, while JavaScript is used for more complex interactions and animations. Pros: Natively supported by web browsers Lightweight and efficient for web use Can be combined with libraries like GreenSock (GSAP) for advanced animations Cons: Limited to web applications Requires coding knowledge Toon Boom Harmony Toon Boom Harmony is a professional-grade software used for 2D animation. It’s popular in the animation industry for creating high-quality cartoons and animations. Pros: Industry-standard for 2D animation Robust drawing and rigging tools Excellent for character animation Cons: Expensive Steeper learning curve for beginners Techniques for Animating Text Animating text can add a dynamic element to your content, making it more engaging and visually appealing. Here are some techniques for animating text: Basic Text Animations Fade In/Out: Gradually increase or decrease the opacity of the text to create a smooth transition. Slide: Move text in or out of view from different directions (left, right, top,

Scroll to Top